
Winning the Battle Against MsMpEng.exe: Reducing CPU Usage in Windows 11 – Effective Strategies Inside!
Winning the Battle Against MsMpEng.exe: Reducing CPU Usage in Windows 11 – Effective Strategies Inside
MsMpEng.exe , aka antimalware service executable , is a native antivirus, anti-malware & spyware program in Windows 10. While running in background, it scans for any suspicious virus and takes active steps to prevent them from further infecting our computer.
Note that MsMpEng.exe can also be a resource-hungry program and that’s why MsMpEng.exe has been eating up so much of your CPU usage, causing computer slowdown, lagging and even100% Disk Usage issues.
But don’t worry, here in this article, we’ll provide 3 effective workarounds for you to put this nasty problem to bed in no time…
Disclaimer: This post includes affiliate links
If you click on a link and make a purchase, I may receive a commission at no extra cost to you.
3 Fixes for MsMpEng.exe Eating Up Too Much CPU
You may not have to try all these fixes; just work your way down the list until the problem is resolved.
- Prevent Windows Defender from scanning its own folder
- Disable Real-Time Protection and reschedule your Windows Defender
- Use the Local Group Policy Editor to turn off Windows Defender
Fix 1: Prevent Windows Defender from scanning its own folder
- On your keyboard, press the Windows logo key
 , then copy & paste Virus & threat protection into the box and clickVirus & threat protection .
 , then copy & paste Virus & threat protection into the box and clickVirus & threat protection .
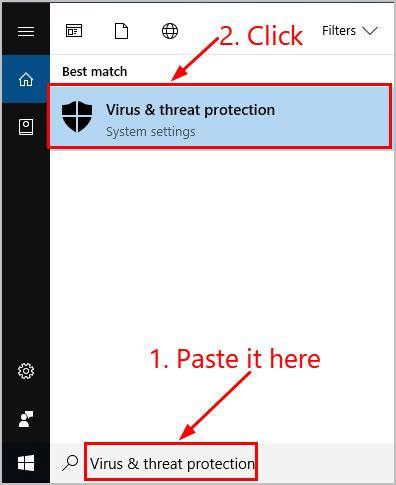
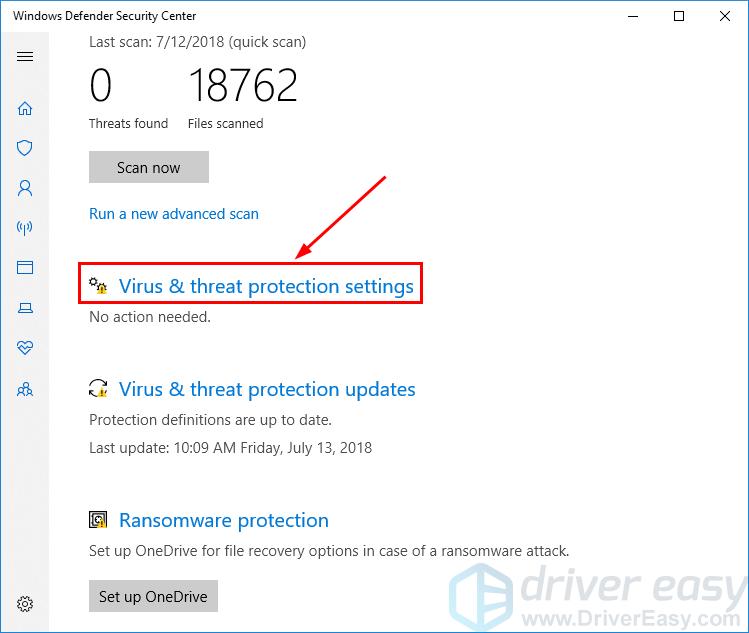
- Click Virus & threat protection settings .
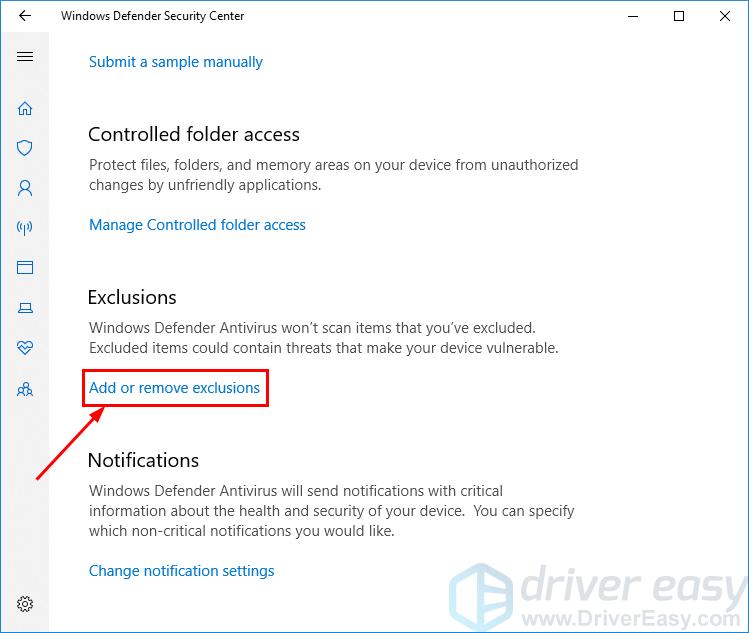
- Scroll down to the bottom and clickAdd or remove exclusions .
- ClickAdd an exclusion >Folder .
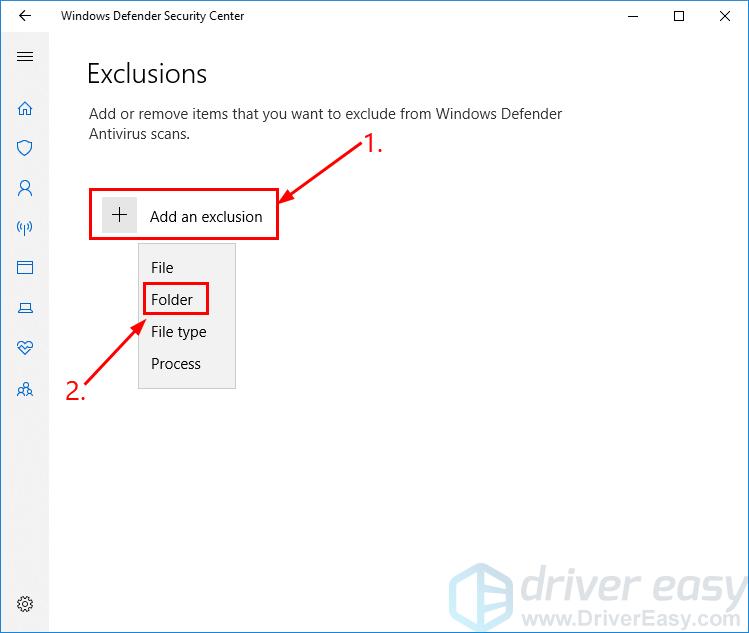
- Copy & paste C:\Program Files\Windows Defender into the box and click SelectFolder .

- See if MsMpEng.exe is still hogging your CPU usage. If the problem persists, move on toFix 2 .
Fix 2: Disable Real-Time Protection and r eschedule your Windows Defender
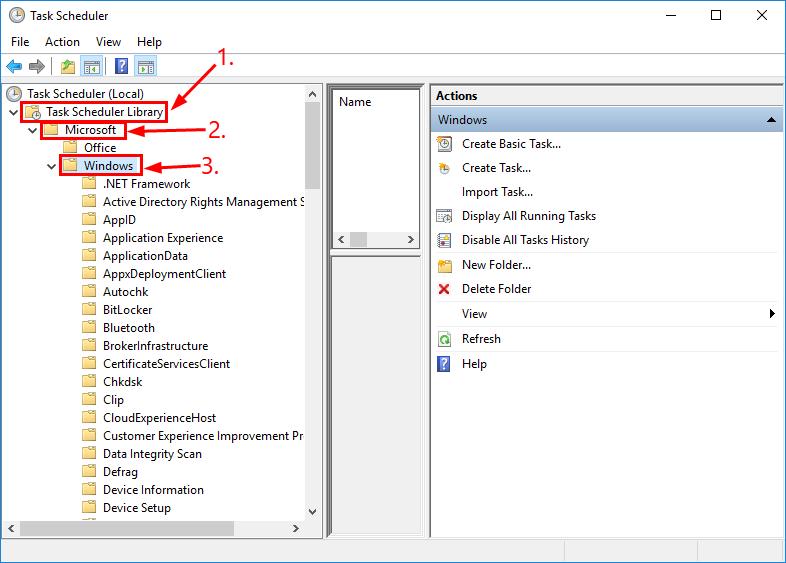
- On your keyboard, press the Windows logo key andR at the same time , then copy & paste taskschd.msc into the box and pressEnter .

- Locate and double-click onTask Schedule Library > Microsoft >Windows .
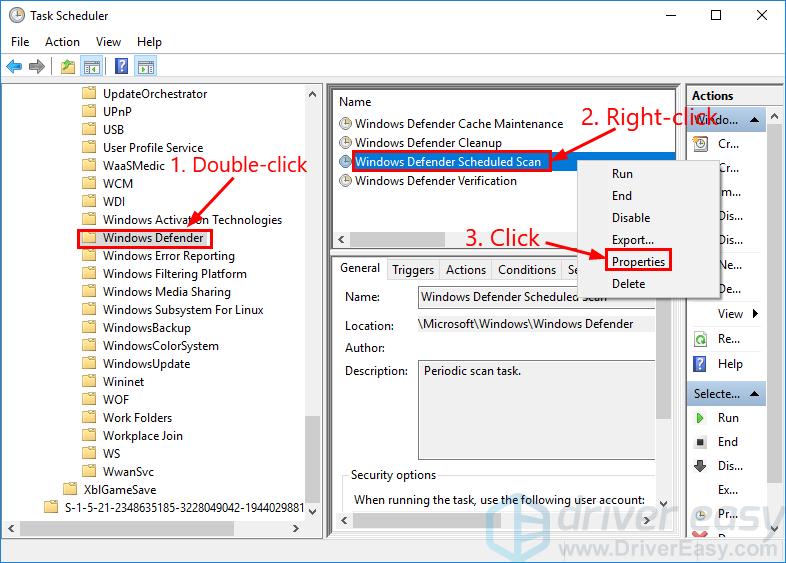
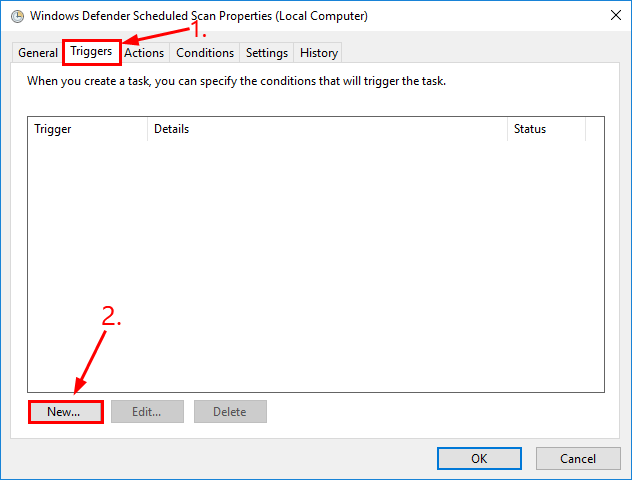
- Scroll down to the bottom, double-click onWindows Defender , then right-click onWindows Defender Scheduled Scan and clickProperties .
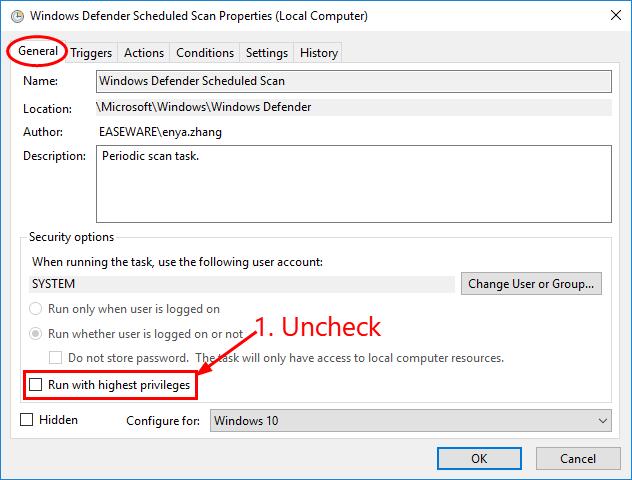
- In theGeneral tab, un-checkthe box beforeRun with highest privileges .
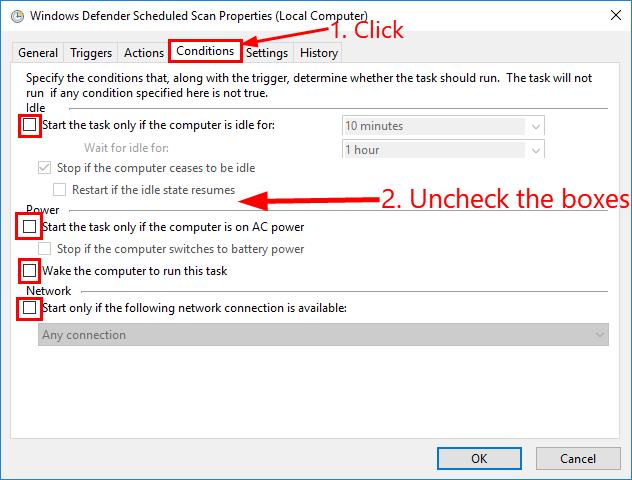
- Click theConditions tab, make surethe boxes in this window areunchecked .
- Click theTriggers tab >New… .
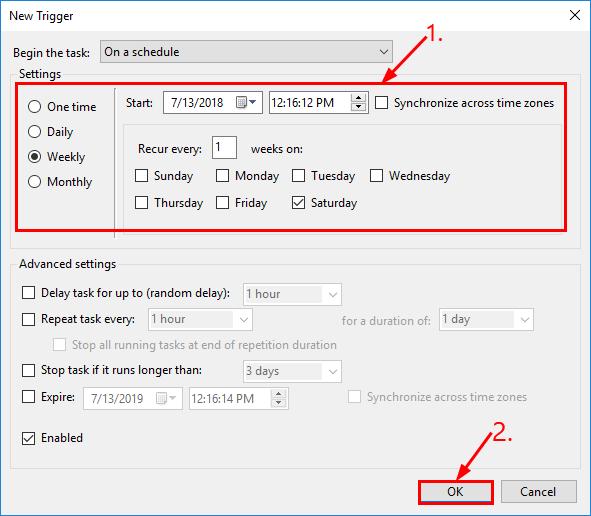
- Schedule your ownWindows Defender scan. Carefully choose the frequency, scan time and date at your own convenience and clickOK .
- Restart your computer. Hopefully this time your MsMpEng.exe won’t be hogging too much of your CPU usage.
Fix 3: Use the Local Group Policy Editor to turn off Windows Defender
Note thatFix 3 is about to turn off yourWindows Defender program which might leave your computer at the mercy of virus and malware attacks. Please proceed with caution.
- On your keyboard, press the Windows logo key andR at the same time, then copy & pastegpedit. msc into the box and pressEnter .

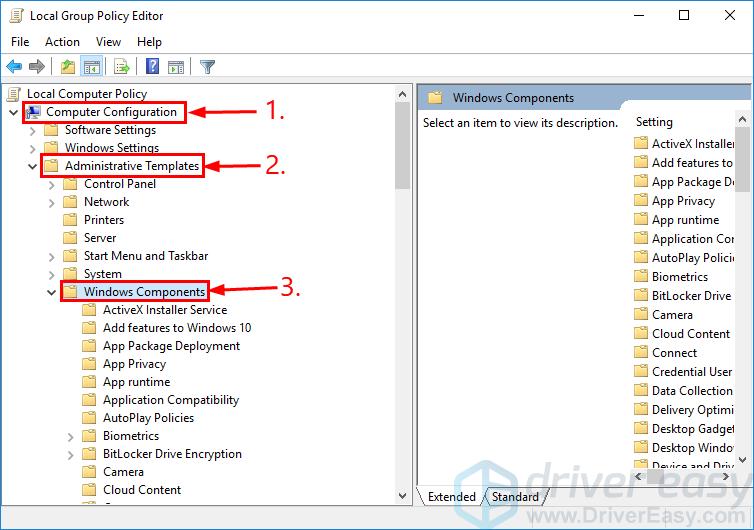
- Locate and double-click on Computer Configuration >Administrative Templates >Windows Components .
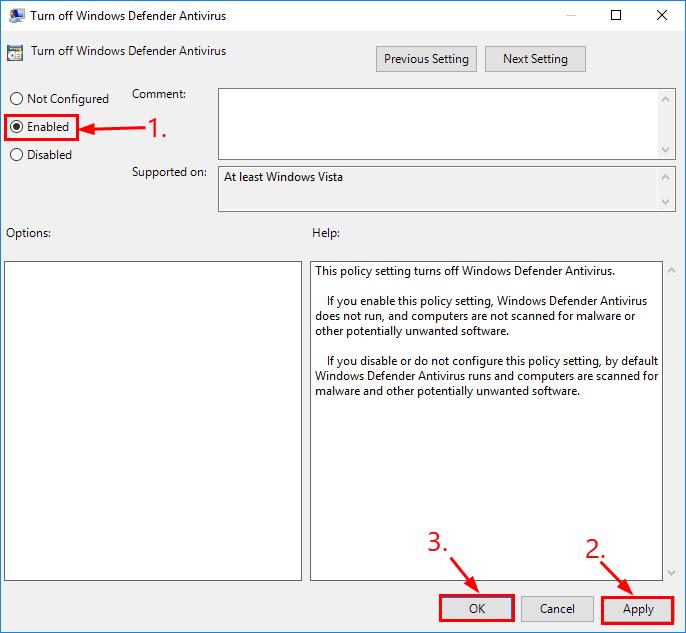
- Locate and double-click onWindows Defender Antivirus (aka. Windows Defender , same as below). Then double-click on Turn off Windows Defender Antivirus .
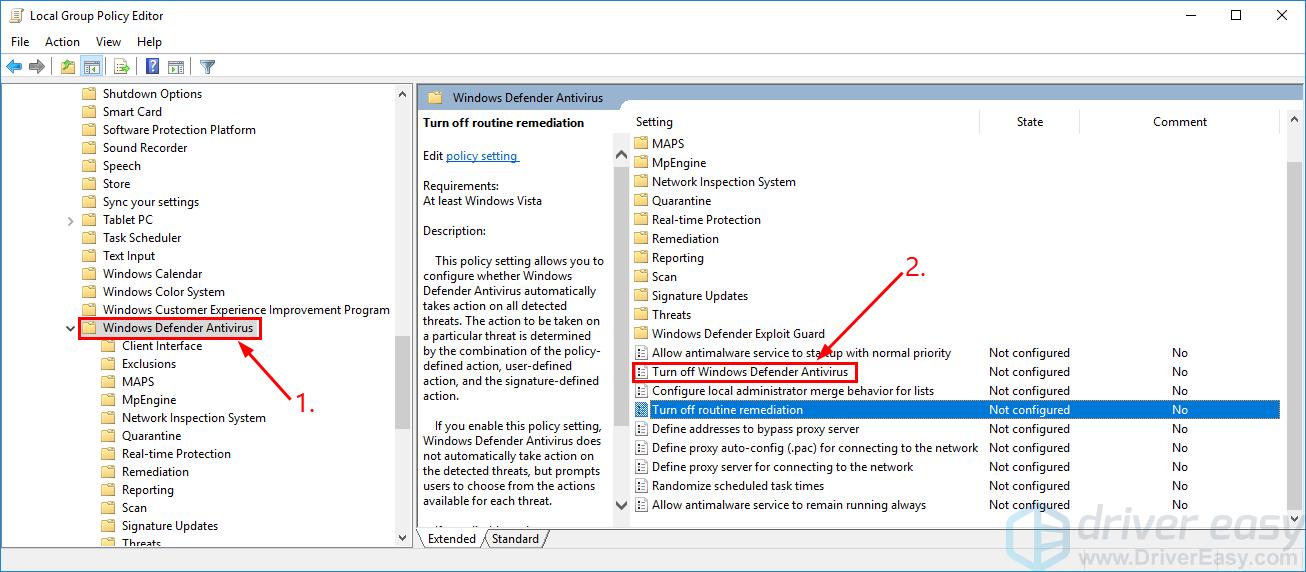
- Choose theEnabled option, and clickApply >OK .
- Restart your computer and see if your computer runs normally now.
Want us to fix the problem for you?
If the fix above didn’t work, and you don’t have the time or confidence to troubleshoot the problem for yourself, get us to fix it for you. All you need to do is buy a 1-year subscription to Driver Easy (just $29.95) and you get free technical support as part of your purchase. This means you can contact our computer technicians directly and explain your problem, and they’ll investigate to see if they can resolve it remotely.
That’s it – top 3 fixes for your MsMpEng.exe-eating-up-too-much-CPU-in-Windows 10 problem. Hope this helps and feel free to comment below if you have any further questions. 🙂
Also read:
- [Updated] 2024 Approved Grasping Your YouTube Popularity with Precision
- [Updated] In 2024, Gentle Echoes Mac and Windows Sound Controls
- [Updated] Perfecting the Pause How to Craft Exceptional Slow Motion Videos
- Diagnosing & Repairing When You Can't Watch Netflix – Solutions Inside!
- Guardian Setting for Peaceful Windows 11 Rest
- In 2024, A Perfect Guide To Remove or Disable Google Smart Lock On Honor Magic 6 Pro
- In 2024, Top 4 Ways to Trace Xiaomi Redmi Note 13 5G Location | Dr.fone
- In 2024, Understanding and Proficiently Implementing CC Copyrights
- Is Keeping MSDIA80.DLL Essential for Your System Performance?
- Reappearance of Missing Desktop Icons on Windows 10 - Quick Fix Guide
- Twitch Masterclass: Understanding and Solving Problem Number 4000 in Your Streaming Adventures
- Title: Winning the Battle Against MsMpEng.exe: Reducing CPU Usage in Windows 11 – Effective Strategies Inside!
- Author: Ronald
- Created at : 2025-02-25 04:07:48
- Updated at : 2025-03-01 20:22:47
- Link: https://common-error.techidaily.com/winning-the-battle-against-msmpengexe-reducing-cpu-usage-in-windows-11-effective-strategies-inside/
- License: This work is licensed under CC BY-NC-SA 4.0.