
Troubleshooting Step-by-Step: Correcting Error E80240020 for Successful Windows 10 Setup
Deciphering and Resolving Error 0X80070091 for Successful System Restores in Windows 11 - Expert Tips

A lot Windows 10 users reported that system restore did not complete successfully. And the problem pop-uped asError 0x80070091shown as image above. It’s a good thing that Microsoft has noticed this error and will update this thread soon. However, if you are Windows 10 Advanced user, you can fix it right now via the methods below. If you’ve faced it, just go with the easy fixes below.
Fix One. Rename the WindowsApps folder in Safe Mode
Boot your Windows 10 into safe mode:
How to:
a)
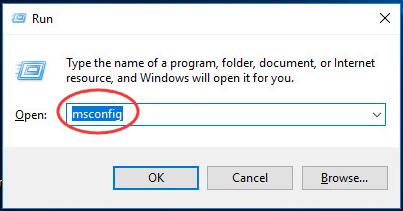
Open run dialog box by pressingWindows key + R key together.
Then type msconfig in the box and hit Enter.
b)
On the pop-up window, view on Boot pane.
Then tick on Safe bootand click OK.
Click Restart, if prompted by system configuration
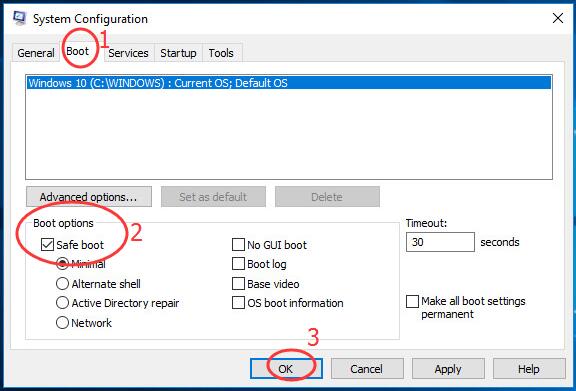
Then your Windows 10 would get into safe mode.
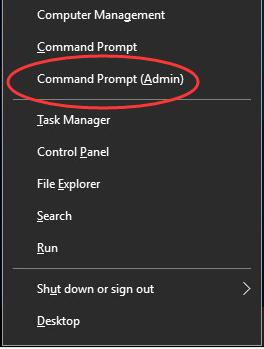
Open quick-access menu by pressing Windows key + X key.
Then click Command Prompt(Admin) to run it as administrator.
When prompted by User Account Control, click Yes.
Type the following commands and hit Enter to run them one by one:
• cd C:\Program Files
• takeown /f WindowsApps /r /d Y
• icacls WindowsApps /grant “%USERDOMAIN%\%USERNAME%”:(F) /t
• attrib WindowsApps -h
• rename WindowsApps WindowsApps.old
Follows the a) & b) of Step 1 to openSystem ConfigurationWindow.
This time uncheck Safe boot to reboot your Windows 10.
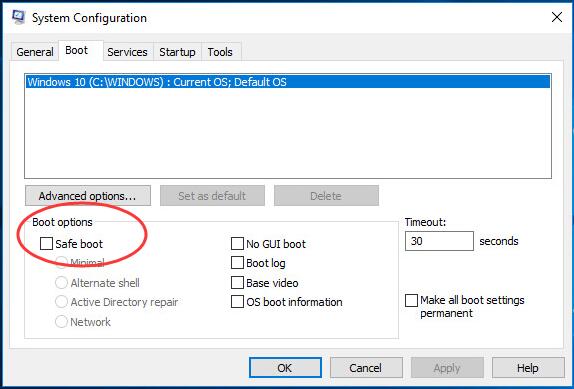
When it finish rebooting, run System Restore again.
Fix Two. Rename the WindowsApps folder in WinRE
Boot your Windows 10 into WinRE(Windows Recovery Environment)
How to:
a)
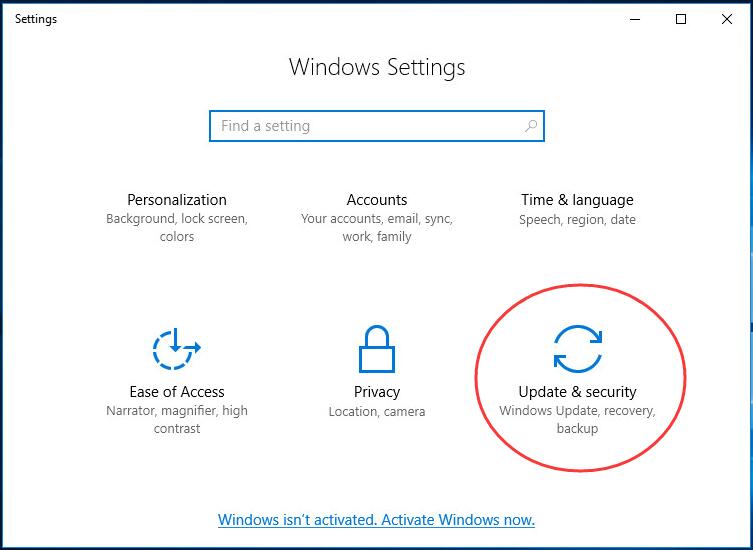
Open Settings Window by pressing Windows key + I key.
Then click Update & security.
b)
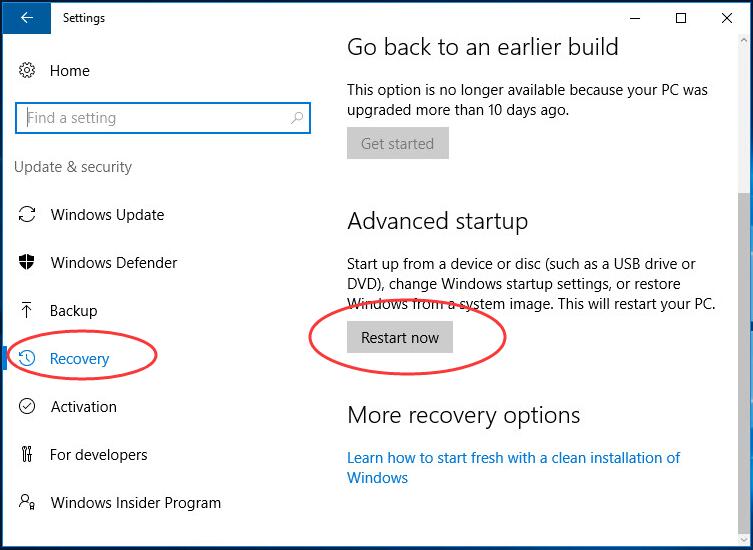
Click Recovery.
Then scroll down on the right side and click Restart now under Advanced startup .
c)
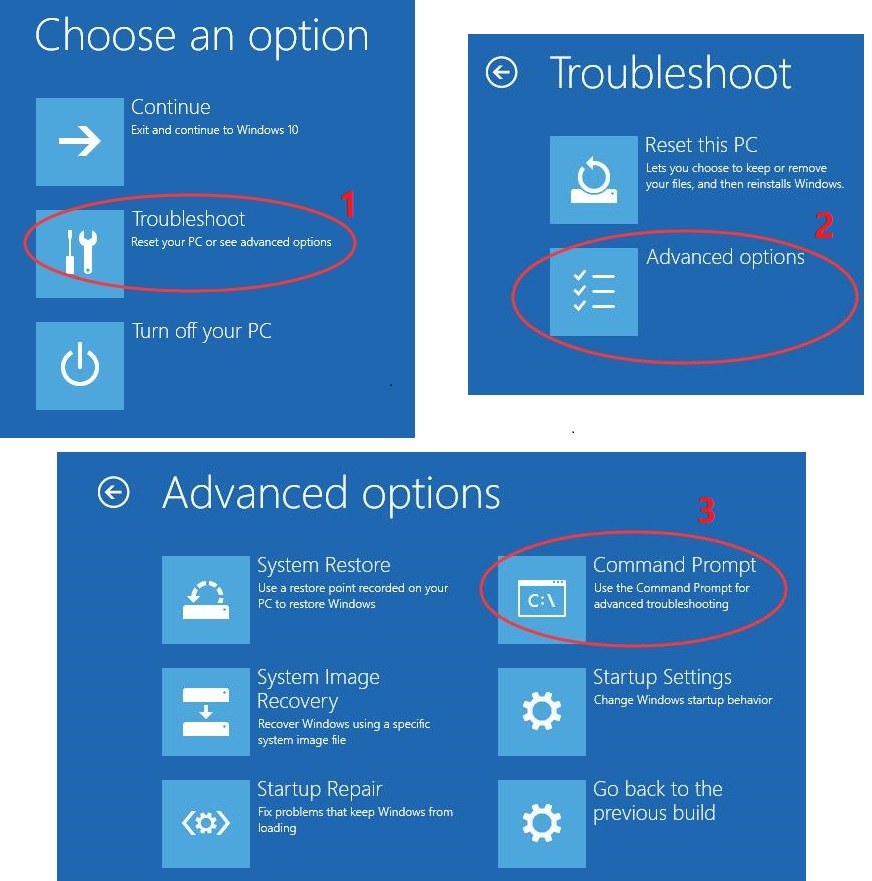
ClickTroubleshoot > Advanced >Command Prompt.
Type the following commands and hit Enter to run them one by one:
• cd C:\Program Files
• attrib WindowsApps -h
• rename WindowsApps WindowsApps.old
Reboot your Windows 10, then run System Restore again.
That’s it!
Also read:
- [New] 2024 Approved Copyright Compliance & Photo/Video Sharing
- [New] 2024 Approved Uncomplicated PC Record Functionality
- [New] In 2024, Discovering the Best Screen Recording Programs for Win11
- [Updated] Historical Gems Art Unshackled by Laws
- Fixing Missing d3dxt9_39.dll Errors in Windows - Expert Solutions and Tips
- In 2024, C-Span Archive Entry The Free Download Guide
- Internet Explorer Won't Open? Discover Proven Fixes for an Instant Solution!
- Les Meilleurs Logiciels De Montage Diaporama Photo Pour PC Et Mac : Le Top 19 De L'année 202Cu
- New 2024 Approved Stream Your Personal Video Collection to Chromecast A Beginners Guide
- Quick Solutions for Overcoming Error 8007000E in Windows Updates
- Restore Sound Functionality in Your Acer Computer - Step-by-Step Troubleshooting
- Step-by-Step Solutions for Correcting LiveKernelEvent Error 144 Malfunctions
- Troubled by the 0X80072EFD Mistake on Your PC? Here’s How to Resolve It
- Unveiling Ultra Details in Minecraft Games for 2024
- Windows 11 v1607 Update Installed Incorrectly – Steps for Resolution
- Title: Troubleshooting Step-by-Step: Correcting Error E80240020 for Successful Windows 10 Setup
- Author: Ronald
- Created at : 2025-01-18 20:53:17
- Updated at : 2025-01-22 18:47:37
- Link: https://common-error.techidaily.com/troubleshooting-step-by-step-correcting-error-e80240020-for-successful-windows-10-setup/
- License: This work is licensed under CC BY-NC-SA 4.0.