
Troubleshooting and Resolving Windows 11'S svchost.exe: Overcoming High CPU Usage Problems
Troubleshooting and Correcting Error 0X80070091 During Windows 11 System Restore - Solved

A lot Windows 10 users reported that system restore did not complete successfully. And the problem pop-uped asError 0x80070091shown as image above. It’s a good thing that Microsoft has noticed this error and will update this thread soon. However, if you are Windows 10 Advanced user, you can fix it right now via the methods below. If you’ve faced it, just go with the easy fixes below.
Fix One. Rename the WindowsApps folder in Safe Mode
Boot your Windows 10 into safe mode:
How to:
a)
Open run dialog box by pressingWindows key + R key together.
Then type msconfig in the box and hit Enter.

b)
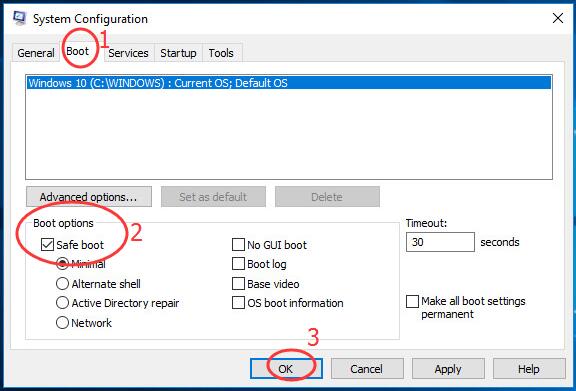
On the pop-up window, view on Boot pane.
Then tick on Safe bootand click OK.
Click Restart, if prompted by system configuration
Then your Windows 10 would get into safe mode.
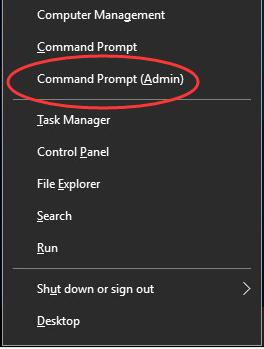
Open quick-access menu by pressing Windows key + X key.
Then click Command Prompt(Admin) to run it as administrator.
When prompted by User Account Control, click Yes.
Type the following commands and hit Enter to run them one by one:
• cd C:\Program Files
• takeown /f WindowsApps /r /d Y
• icacls WindowsApps /grant “%USERDOMAIN%\%USERNAME%”:(F) /t
• attrib WindowsApps -h
• rename WindowsApps WindowsApps.old
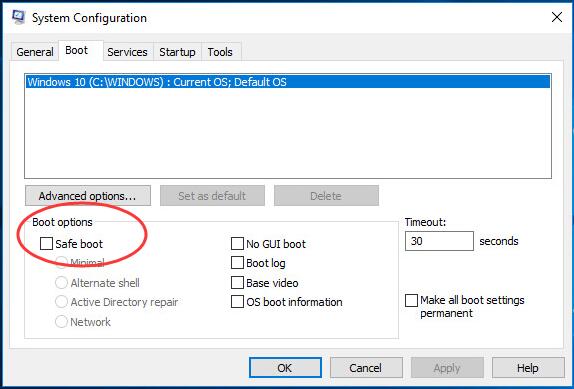
Follows the a) & b) of Step 1 to openSystem ConfigurationWindow.
This time uncheck Safe boot to reboot your Windows 10.
When it finish rebooting, run System Restore again.
Fix Two. Rename the WindowsApps folder in WinRE
Boot your Windows 10 into WinRE(Windows Recovery Environment)
How to:
a)
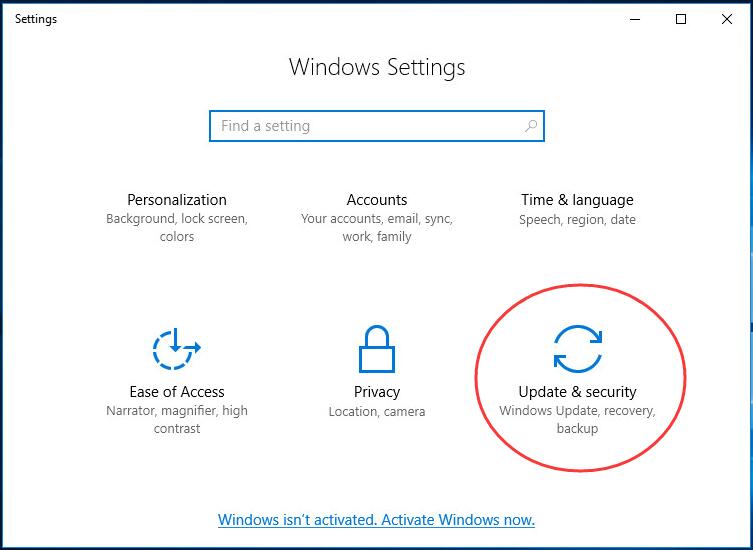
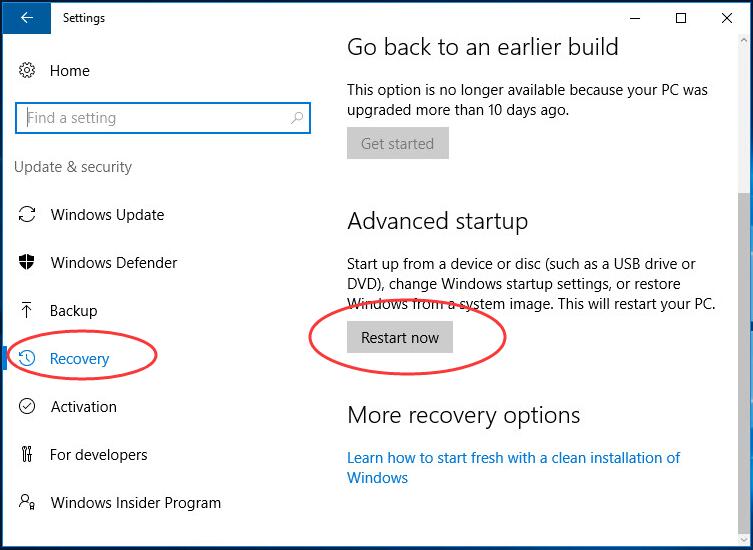
Open Settings Window by pressing Windows key + I key.
Then click Update & security.
b)
Click Recovery.
Then scroll down on the right side and click Restart now under Advanced startup .
c)
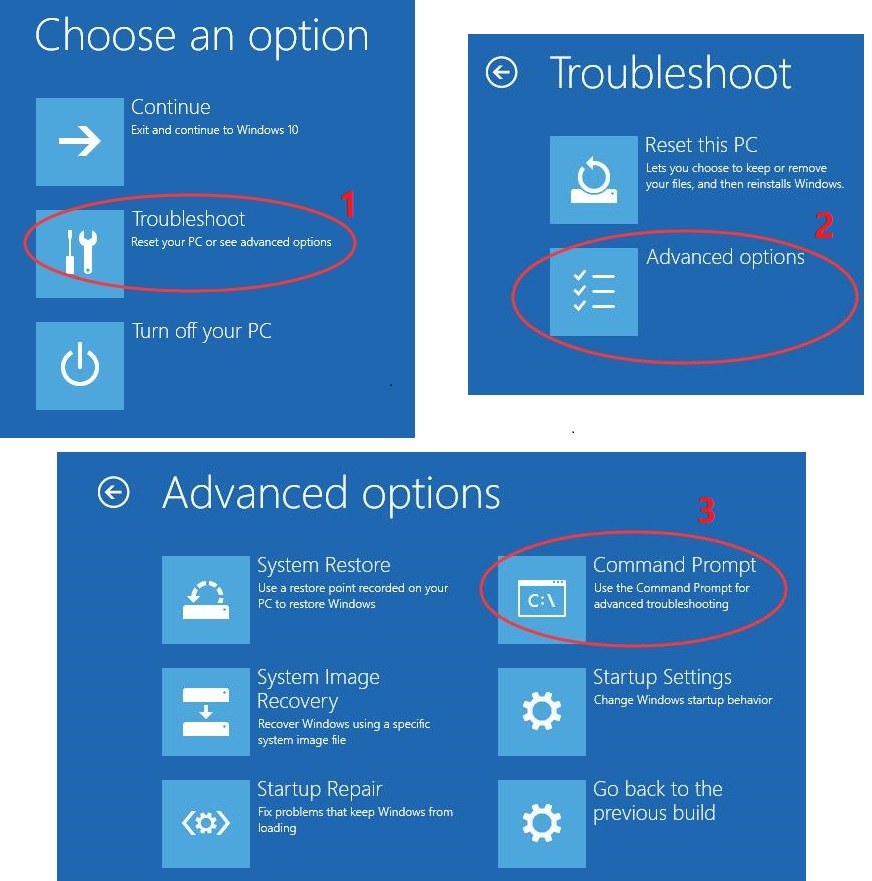
ClickTroubleshoot > Advanced >Command Prompt.
Type the following commands and hit Enter to run them one by one:
• cd C:\Program Files
• attrib WindowsApps -h
• rename WindowsApps WindowsApps.old
Reboot your Windows 10, then run System Restore again.
That’s it!
Also read:
- [New] In 2024, Elevate Your Online Presence Audios for Your Channel
- Easy Ways to Repair and Resolve Error 0xC0000098 on Your PC Running Windows
- Fix the Error of Unfortunately the Process.com.android.phone Has Stopped on Honor 90 GT | Dr.fone
- Hitman 3 Dark Screen Fiasco - Fixing the PC Game Issue Effectively
- How To Resolve Windows Keyboards With Non-Responsive Keys: Expert Guide
- How to Successfully Download and Update Your Epson ET-3760 Windows Printer Drivers: A Comprehensive Guide
- In 2024, Top 10 Telegram Spy Tools On Samsung Galaxy A23 5G for Parents | Dr.fone
- Mastering SRT MP4 Conversion for Video Enhancement for 2024
- Pioneering Techniques in Documentary Scripting for 2024
- Resolving Windows 11 Copy and Paste Problems for Smooth Operations
- Score a Steal: Apple MacBook Pro (M3) Slashed Price in Amazon Spring Sale, Detailed Report
- Simple Solutions for Quickly Resolving Lagging Keyboard Responses
- Sync Your Xbox One Controller Easily with This Simple Troubleshoot Tutorial
- Unblocking a Restricted Boot Drive: Solutions for Windows 10 Users
- Unleash Creativity with YouTube Clips - Make Animation GIFs Easily
- What to Do When Torrent Is Not Downloading
- Title: Troubleshooting and Resolving Windows 11'S svchost.exe: Overcoming High CPU Usage Problems
- Author: Ronald
- Created at : 2025-01-12 16:06:01
- Updated at : 2025-01-16 16:09:42
- Link: https://common-error.techidaily.com/troubleshooting-and-resolving-windows-11s-svchostexe-overcoming-high-cpu-usage-problems/
- License: This work is licensed under CC BY-NC-SA 4.0.