Tackling the 'Windows 11 Couldn't Be Installed' Issue - Solving Error Code 80240020 Easily
Error Code 0X80073CF9 in Windows 11 Explained - Understand and Solve the Issue Today
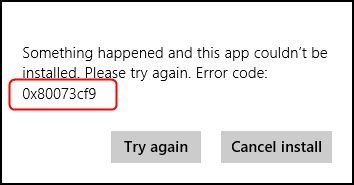
If you’re on Windows 10,8.1 or 8, and you try to install the apps from Store, you may get this error saying Something happened and this app couldn’t be installed. Please try again. Error code: 0x80073cf9
You’re not alone. Many Windows users are reporting it. But the good news is you can fix it. Go on with the easy solution below.
Note: The screens shown below are from Windows 10, but all the fixes also apply to Windows 8 too.
Please click the solution according to your Windows operating system.
For Windows 8 users:Restore AUInstallAgent directory in the Windows Folder
For Windows 10/8.1 users:Restore AppReadiness directory in the Windows Folder
Disclaimer: This post includes affiliate links
If you click on a link and make a purchase, I may receive a commission at no extra cost to you.
For Windows 8 users: Restore AUInstallAgent directory in the Windows Folder
0x80073cf9 could be probably caused by the missing AUInstallAgent directory in your Windows 8.
To restore it:
On your keyboard, press the Windows logo key
 and E at the same time to invoke the File Explorer window.
Go to This PC > Local Disk (C:) > Windows .
 and E at the same time to invoke the File Explorer window.
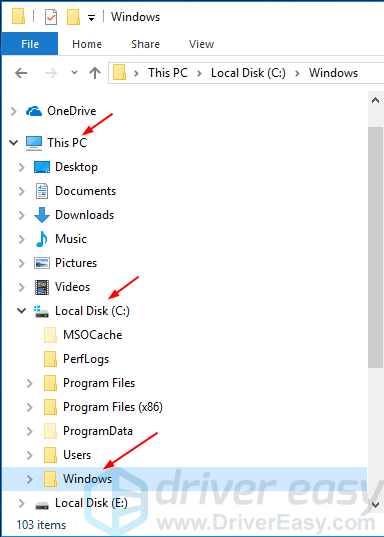
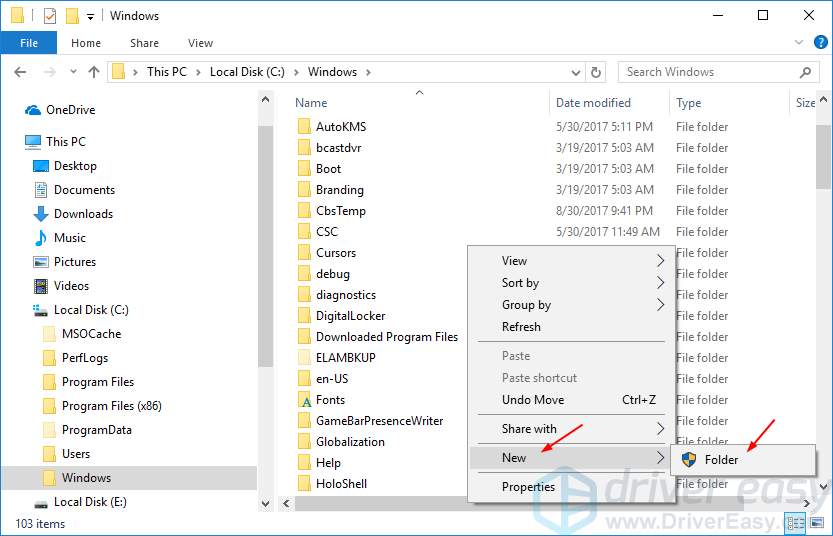
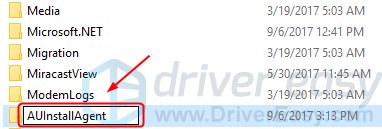
- Right-click on the blank area to click New , then Folder .
ClickYes when prompted by User Account Control.
Name the new folder: AUInstallAgent .
- Reboot your Windows 8. Then go to the Windows App Store to install the app again to see if it’s successful.
For Windows 10/8.1 users: Restore AppReadiness directory in the Windows Folder
0x80073cf9 could be probably caused by the missing AppReadiness directory in your Windows 10 or 8.1.
To restore it:
On your keyboard, press the Windows logo key
and E at the same time to invoke the File Explorer window.Go to This PC > Local Disk (C:) > Windows .
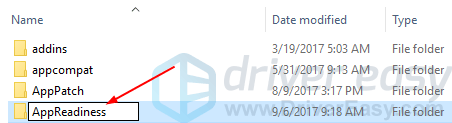
3) Right-click on the blank area to click New, then Folder .
ClickYes when prompted by User Account Control.
Name the new folder: AppReadiness .
- Reboot your Windows 10/8.1. Then go to the Windows App Store to install the app again to see if it’s successful.
Also read:
- [New] 2024 Approved Leveraging LUTs for Rich Color Grading in AR Apps
- [Updated] Understanding the Dynamics of Instagram Unfollows for 2024
- 2024 Approved Reawakening Dormant Connections with Your OBS Cam
- Get Help with File Explorer in Windows 11, Easily!
- How To Change Your Apple ID on Apple iPhone 8 Plus With or Without Password
- How to Check Distance and Radius on Google Maps For your Poco M6 Pro 5G | Dr.fone
- How To Improve Keyboard Performance & Reduce Delay on Windows 10 Systems
- How to Repair a Non-Functional Lenovo Function (Fn) Key - Simple Fixes
- Persistent Mouse Disappearance in Windows 10 - How to Resolve It Once and For All
- PickUp Vs. Competitors An Incisive Review of Android's Top Editor
- Protecting Your Secrets: Why Sharing Sensitive Data with ChatGPT May Not Be Safe
- Shopping Guide: Cameras & Windows Hello
- Step-by-Step Instructions: Addressing the 'Unknown USB Device' And Port Reset Complications in Your Windows 10 System
- The Future of Action Photography TomTom's Bandit Review for 2024
- Troubleshoot & Replace: Resolving the d3dx9_43.dll Error in Windows Easily
- Watching Dark? Get Smart About German Instead
- Why Isn't My Razer Keyboard Lighting Up? Solutions Inside!
- Title: Tackling the 'Windows 11 Couldn't Be Installed' Issue - Solving Error Code 80240020 Easily
- Author: Ronald
- Created at : 2024-10-03 10:04:35
- Updated at : 2024-10-07 07:01:33
- Link: https://common-error.techidaily.com/tackling-the-windows-11-couldnt-be-installed-issue-solving-error-code-80240020-easily/
- License: This work is licensed under CC BY-NC-SA 4.0.