
Solving Hardware Anomaly: LiveKernelEvent 141
Overcoming the Challenge: Unsupported Monitor Input Error Now Solved
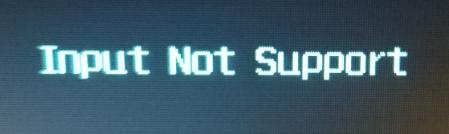
If you see ‘Input Not Supported ‘ warning floating on your monitor, don’t worry. You can fixInput Not Supported error quickly and easily.
Why does the error occur to my monitor?
The ‘Input Not Supported ‘ error usually occurs to your computer after booting up, and it happens with a black screen on your computer. This problem happens especially when you’re using multiple monitors. Meanwhile, most of the people who are having this problem are using the Acer monitors.
The input is not supported by your monitor because your screen resolution is set to the wrong resolution. In addition, your monitor driver issue can result in the error.
But don’t worry. We’ll help you fix your problem.
Try these fixes
Here are the solutions that have helped people resolve the error. You don’t have to try them all, just work your way down the list until everything’s working again.
- Troubleshoot the monitor connection
- Change the display settings
- Update your monitor driver and graphics card driver
Fix 1: Troubleshoot the monitor connection
You may see the ‘Input Not Supported ‘ error if there’s something wrong with the monitor connection. So you should check the monitor cable to make sure it works properly. Or you can switch to a new monitor cable.
In addition, make sure the connection ports are working correctly.
Fix 2: Change the display settings
As you may know, “Input Not Supported ” by your monitor because of the improper screen resolution, so you can change the screen resolution and refresh rate to fix the problem.
Here’s what you can do:
Note : you’ll need to log into Windows to perform these steps. If you can’t log into your computer, boot your computer intoSafe Mode and then follow the instructions.
If you’re using Windows 11/10:
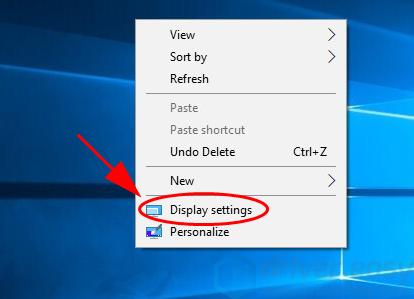
- On your desktop, right click on anyempty area and selectDisplay settings .

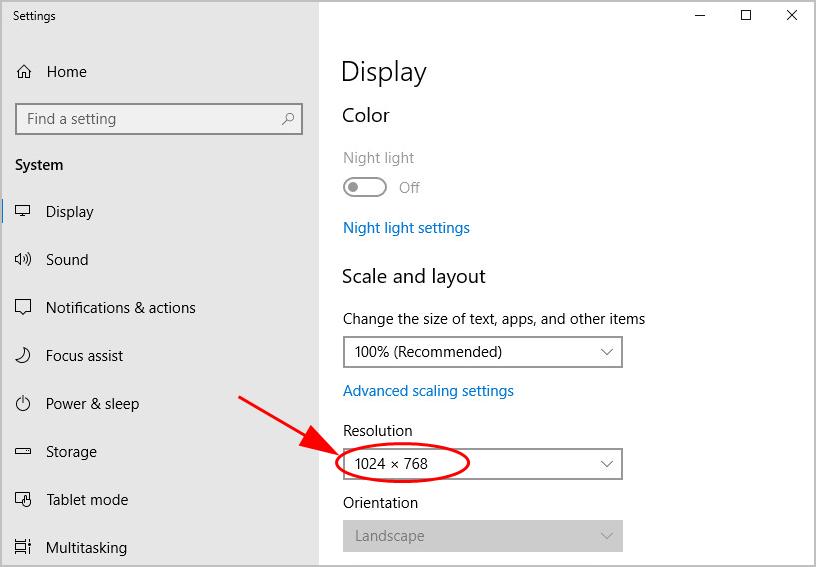
- Scroll down and find theScale and layout section, then choose therecommended resolution for your display. If you’re on Windows 11, it’ll beDisplay resolution .
- If you see a popup to confirm the change, click Keep changes to confirm.
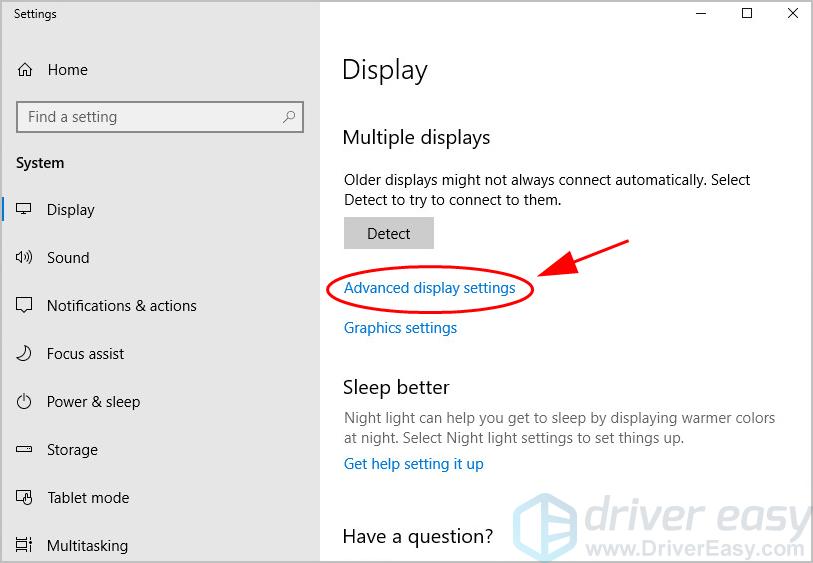
- Then clickAdvanced display settings .
- Under the monitor name that is having the Input Not Supported error, clickDisplay adapter properties for Display .

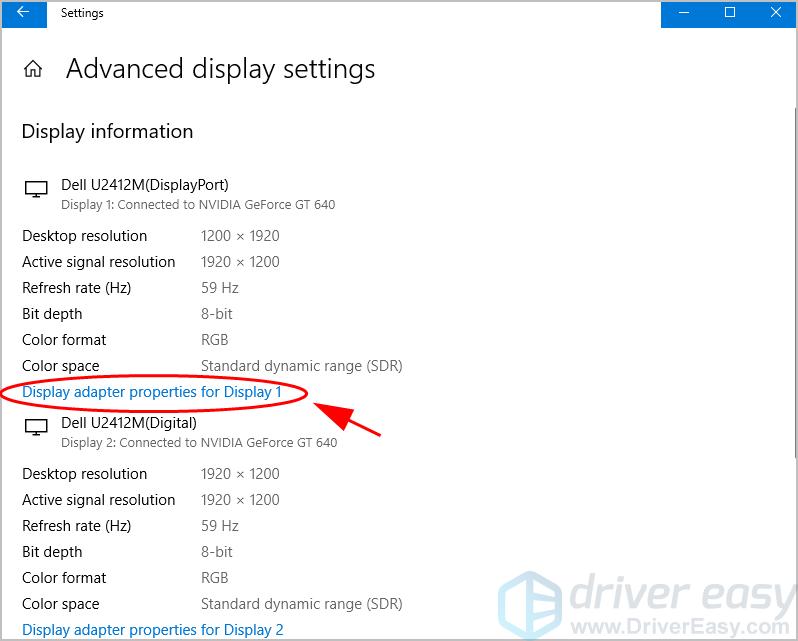
6. In the popup pane, click theMonitor tab. In theScreen refresh rate , choose therecommended ordefault rate in the drop down menu.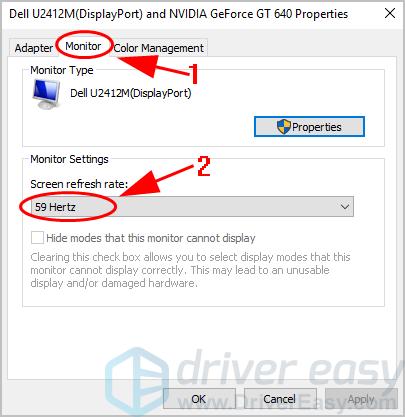
7. Save the changes and restart your computer.
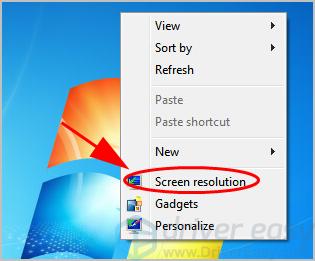
If you’re using Windows 8 and Windows 7:
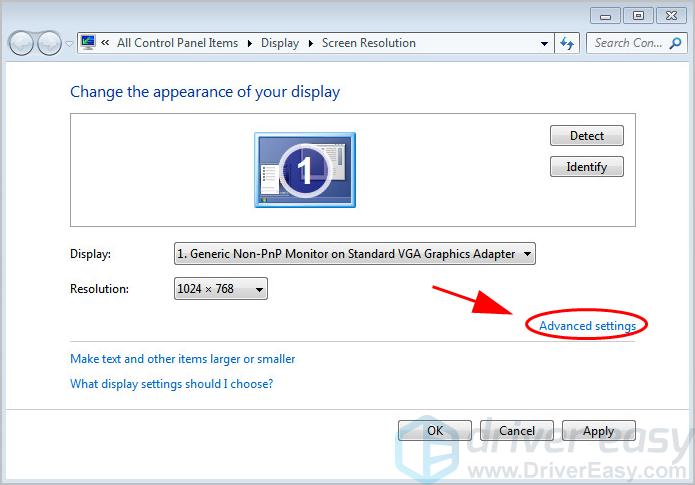
- Right click on anyempty area on your desktop, and selectScreen resolution .
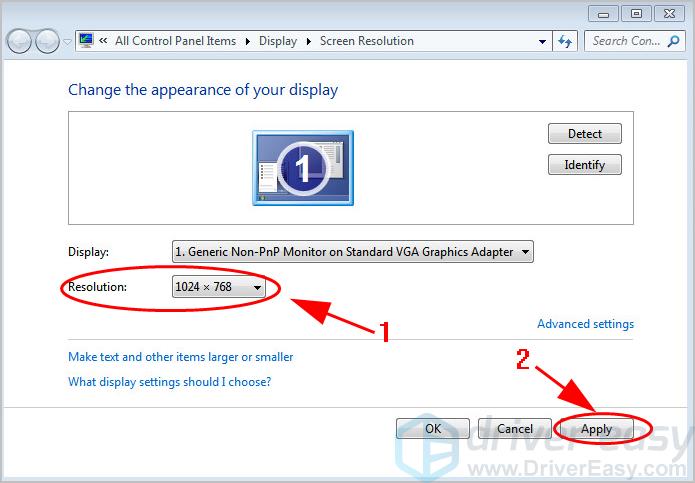
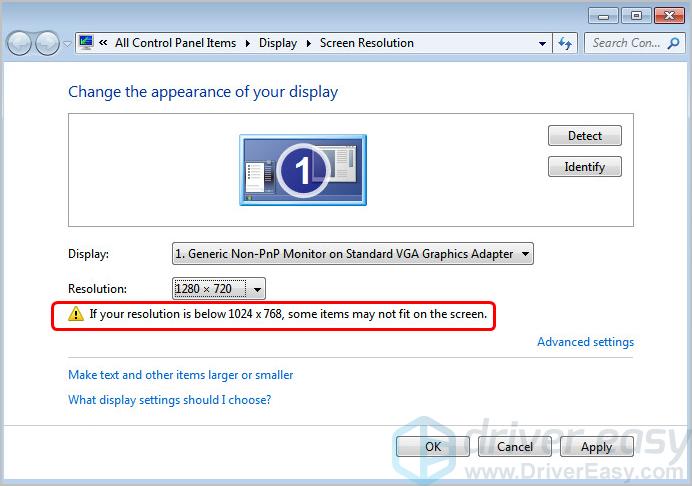
- If you have multiple displays, select the display that is having the error. Then choose therecommended resolution , and clickApply .
If your current screen resolution is not proper, you’ll see a notification like this: - On the same pane, clickAdvanced settings .
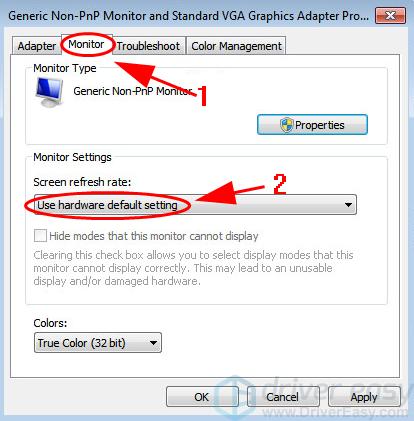
- Click theMonitor tab, then choose therecommended or default refresh rate setting in theScreen refresh rate section.
- Save the changes and restart your computer.
You should fix the error and boot your computer as normal.
Fix 3: Update your monitor driver and graphics card driver
The missing or corrupted device drivers (especially the monitor driver and graphics card driver) will cause the “Input Not Supported” error on monitors. So you should update these drivers in your computer.
Note : you’ll need to log into Windows to perform these steps. If you can’t log into your computer, boot your computer intoSafe Mode and then follow the instructions.
There are two ways to update drivers:manually andautomatically :
Manual driver update – You can go to the manufacturer’s website of your device, find the latest version for the driver, then download and install it in your computer. This requires time and computer skills.
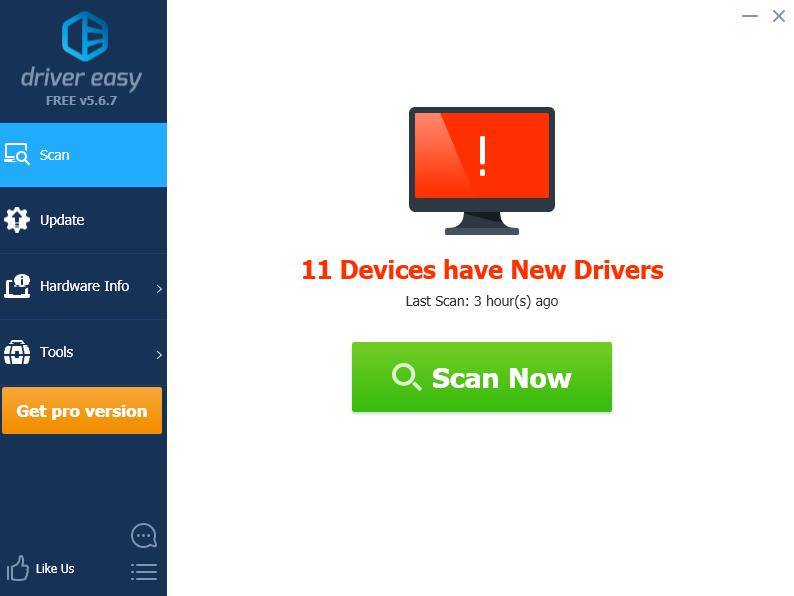
Automatic driver update – If you don’t have time or patience, you can do it automatically with Driver Easy .
Driver Easy will automatically recognize your system and find the correct drivers for it. You don’t need to know exactly what system your computer is running, you don’t need to risk downloading and installing the wrong driver, and you don’t need to worry about making a mistake when installing.
You can update your drivers automatically with either theFREE or thePro version of Driver Easy. But with the Pro version it takes just 2 clicks (and you get full support and a30-day money back guarantee ):
- Download and install Driver Easy.
- Open Driver Easy and clickScan Now . Driver Easy will then scan the problem drivers in your computer.
- Click theUpdate button next to the flagged monitor and graphics card to automatically download the correct version of their driver (you can do this with theFREE version). Then install it in your computer.
Or clickUpdate All to automatically download and install the correct version of all the drivers that are missing or out of date on your system (this requires thePro version – you’ll be prompted to upgrade when you clickUpdate All ).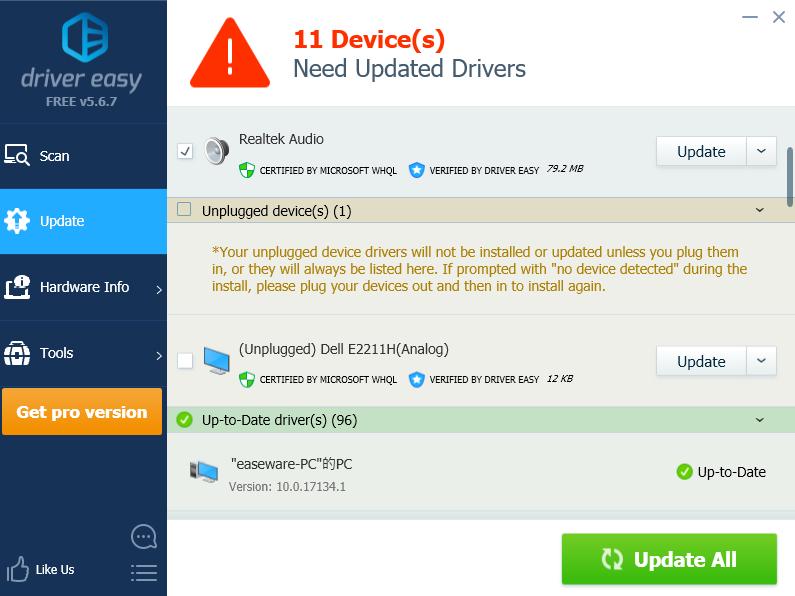
4. Restart your computer to take effect.
So there you have it – three easy methods to fixmonitor input not supported issue. If you have any questions, feel free to leave a comment below and we’ll see what more we can do.
Also read:
- [New] Essential Tips for Magix Video Pro X Users
- [Updated] 2024 Approved The Roadmap to Fame Unleashing Instagram's #9 Powerful Techniques
- [Updated] Humor Hub IPhones Galore for 2024
- A Majority of Respondents Say Global Equities Are Now Overbought and Could Be Vulnerable to a Correction in Coming Months as Investors Begin to Price in the Risk of Higher Inflation and Interest Rates.
- Expert Hacks to Combat Minecraft Lag and Enhance Gaming Experience
- Find The Right Aspect Ratio For Your Video for 2024
- Free WinX DVD Ripper: Convert Your DVDs to MP4, AVI & More Compatible Formats for iOS/Android Devices
- How to Resolve a Stubborn 'Failed to Update Warframe' Issue
- In 2024, Unlock Higher Engagement The Power of Precise Timestamping
- Mastering Autofocus on iPhone A Step-by-Step Approach
- Mastering Effective Interview Techniques
- Mastering Your PC: Finding and Using the Start Button on Windows 10
- Mint Memes of Merriment for 2024
- Overcoming Security Error Messages During Firefox Login Attempts
- Resolved: How to Fix 'The System Can Not Access the Specified Device Path or File' On Windows
- Resolved: How to Fix Windows 10 Crashing at Boot
- Resolving the 'No Audio Output' Installation Issue on Windows 10 & 11
- Troubleshooting HP Laptop USB Connectivity: Fixes & Solutions!
- Universal Unlock Pattern for Sony Xperia 10 V
- Title: Solving Hardware Anomaly: LiveKernelEvent 141
- Author: Ronald
- Created at : 2025-01-18 17:05:04
- Updated at : 2025-01-22 21:40:12
- Link: https://common-error.techidaily.com/solving-hardware-anomaly-livekernelevent-141/
- License: This work is licensed under CC BY-NC-SA 4.0.