
Resolving Windows 10 Casting Problems to Peripherals and TVs
Deciphering and Resolving Error 0X80070091 for Successful System Restores in Windows 11 - Expert Tips

A lot Windows 10 users reported that system restore did not complete successfully. And the problem pop-uped asError 0x80070091shown as image above. It’s a good thing that Microsoft has noticed this error and will update this thread soon. However, if you are Windows 10 Advanced user, you can fix it right now via the methods below. If you’ve faced it, just go with the easy fixes below.
Fix One. Rename the WindowsApps folder in Safe Mode
Boot your Windows 10 into safe mode:
How to:
a)
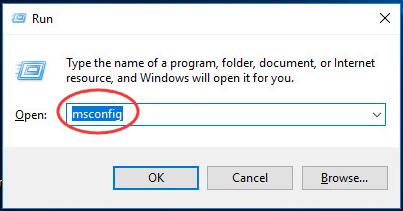
Open run dialog box by pressingWindows key + R key together.
Then type msconfig in the box and hit Enter.
b)
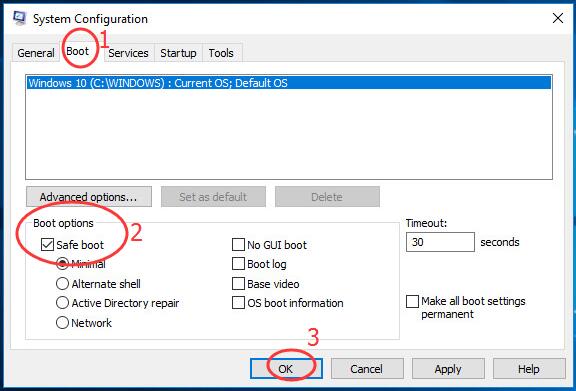
On the pop-up window, view on Boot pane.
Then tick on Safe bootand click OK.
Click Restart, if prompted by system configuration
Then your Windows 10 would get into safe mode.
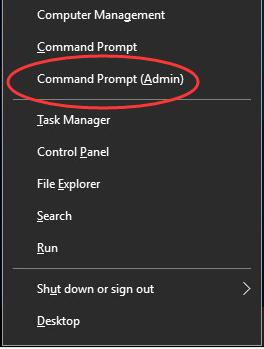
Open quick-access menu by pressing Windows key + X key.
Then click Command Prompt(Admin) to run it as administrator.
When prompted by User Account Control, click Yes.
Type the following commands and hit Enter to run them one by one:
• cd C:\Program Files
• takeown /f WindowsApps /r /d Y
• icacls WindowsApps /grant “%USERDOMAIN%\%USERNAME%”:(F) /t
• attrib WindowsApps -h
• rename WindowsApps WindowsApps.old
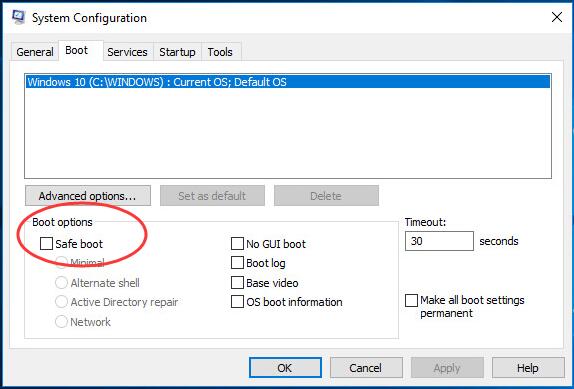
Follows the a) & b) of Step 1 to openSystem ConfigurationWindow.
This time uncheck Safe boot to reboot your Windows 10.
When it finish rebooting, run System Restore again.
Fix Two. Rename the WindowsApps folder in WinRE
Boot your Windows 10 into WinRE(Windows Recovery Environment)
How to:
a)
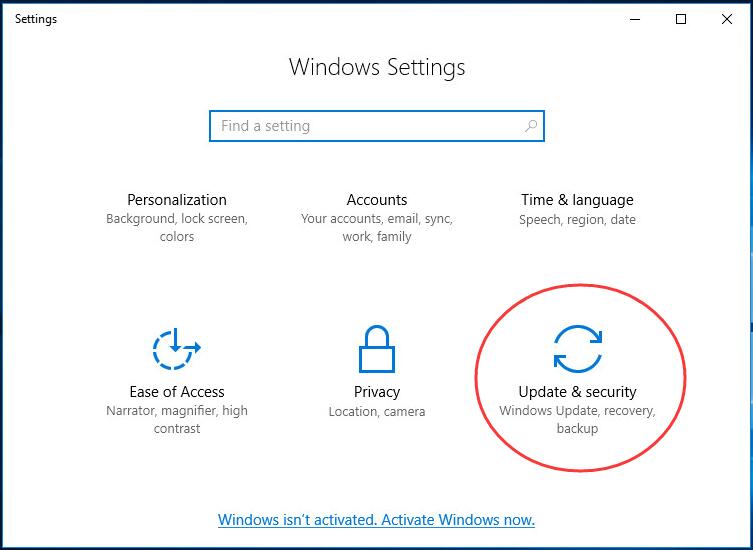
Open Settings Window by pressing Windows key + I key.
Then click Update & security.
b)
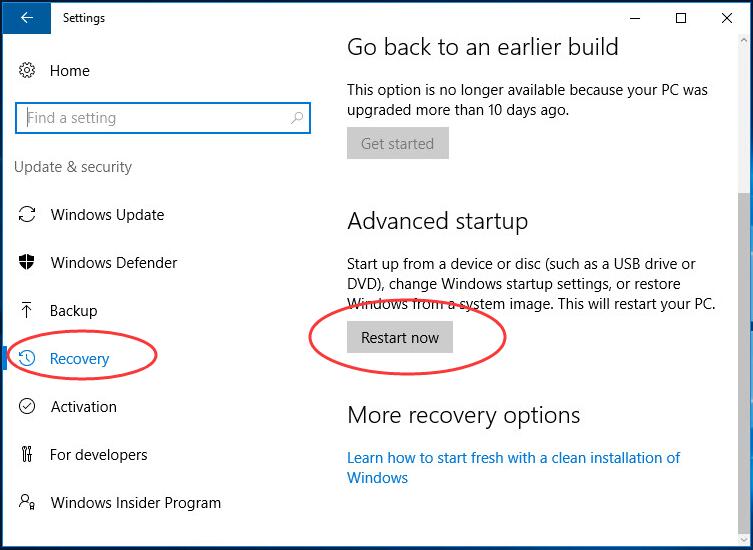
Click Recovery.
Then scroll down on the right side and click Restart now under Advanced startup .
c)
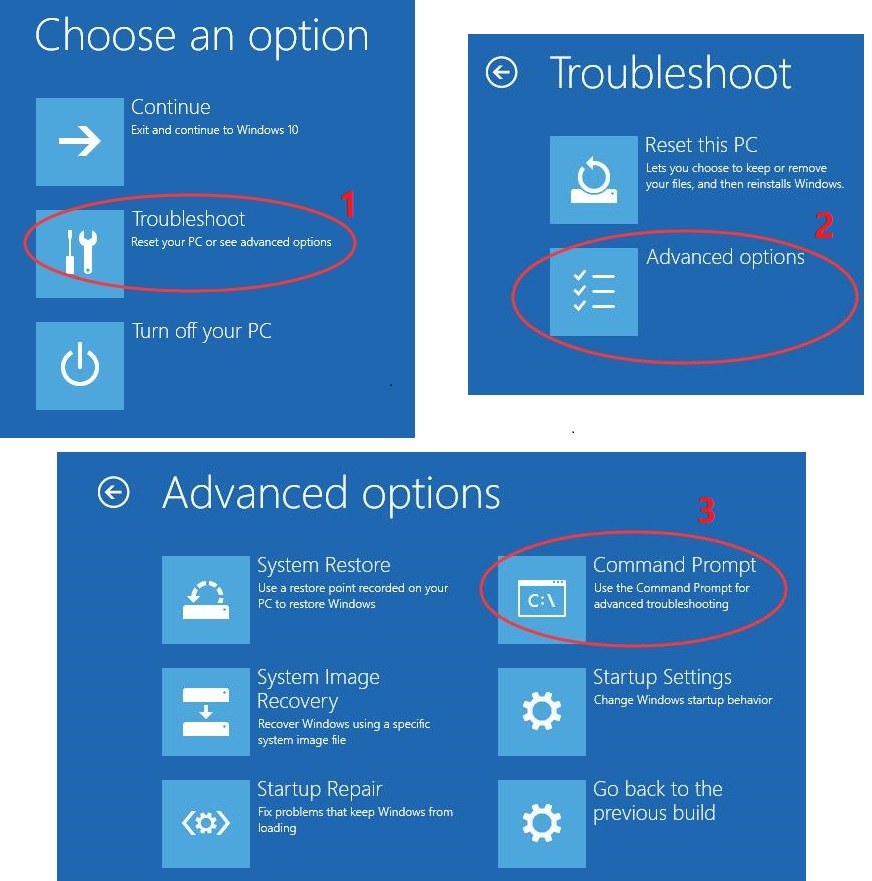
ClickTroubleshoot > Advanced >Command Prompt.
Type the following commands and hit Enter to run them one by one:
• cd C:\Program Files
• attrib WindowsApps -h
• rename WindowsApps WindowsApps.old
Reboot your Windows 10, then run System Restore again.
That’s it!
Also read:
- [New] Your First Steps in the Digital World Course Recommendations
- [Updated] 2024 Approved How Much Do You Earn When a Million Watch Youtube?
- 2024 Approved Earnings Breakdown Youtube's AdSense Payments by Thousands of Views
- Craft Your Facebook Profile Video
- Cutting-Edge Cat Entertainment: Discover the Premier Electronic Toy Picks for Your Pet in 2# Tech_CatToys_2023
- Decoding: Non-Functional Laptop Keys in Windows Environment
- Exploring the Latest Features in Movavi Video 2024+
- Fix There Was a Problem Resetting Your PC Error on Windows 10 [Solved]
- Fixing Issues with the igfxEM Module - Now Operational Again
- Freeze Whole Panel of Content
- Fresh Installation of AMD Driver Packs for Improved Functionality in Windows Operating Systems 11, 7 & XP
- How to Repair Lenovo's Unresponsive FN Key with Simple Solutions
- In 2024, Everything You Need To Know About Unlocked Apple iPhone 11 Pro Max
- Solutions for Resolving the Dxgkrnl Fatal Error in Videos on Windows Systems
- Solving the Mystery of Self-Activating Windows 11 Computers - A Comprehensive Guide
- The Gamer's Handbook: Reviving a Malfunctioning Wireless Gamepad Across All Platforms
- The Harmony of AI and Automotive Voices: Mercedes Leap
- Troubleshooting the Cache Miss Error (ERR_CACHE_MISS) in Google Chrome Easily!
- Ultimate Fix for Your Bluetooth Woes in Windows 11/10: A Simple Walkthrough
- Title: Resolving Windows 10 Casting Problems to Peripherals and TVs
- Author: Ronald
- Created at : 2025-01-26 04:41:56
- Updated at : 2025-01-29 22:49:03
- Link: https://common-error.techidaily.com/resolving-windows-10-casting-problems-to-peripherals-and-tvs/
- License: This work is licensed under CC BY-NC-SA 4.0.