
How to Successfully Repair a PC That Fails to Start Correctly - Now Resolved!
How to Successfully Launch Your Hosted Network on Windows 10 - Solved
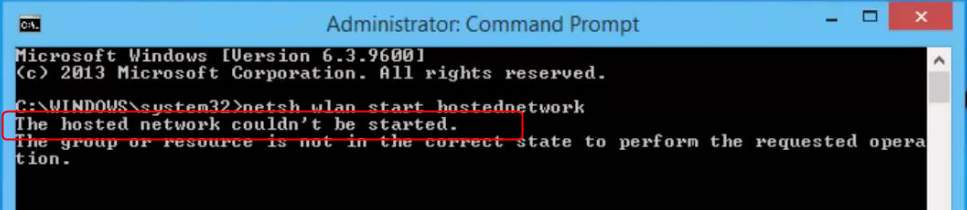
“The hosted network couldn’t be started ” error may occur when you set up WiFi hotspot via command prompt. The issue is very likely due to your WiFi network adapter. But no worry! We’ve got the answer for you. In this post, we will be showing you the tried-and-true methods to fix “The hosted network couldn’t be started” error on Windows 10. Read along please.
Try these fixes
- Enable Microsoft Hosted Network Virtual Adapter
- Check your wireless network adapter
- Update your WiFi driver
Method 1. Enable Microsoft Hosted Network Virtual Adapter
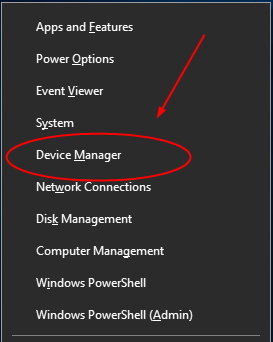
1)PressWindows key +X key together to open quick-access menu.
ClickDevice Manager to open it.
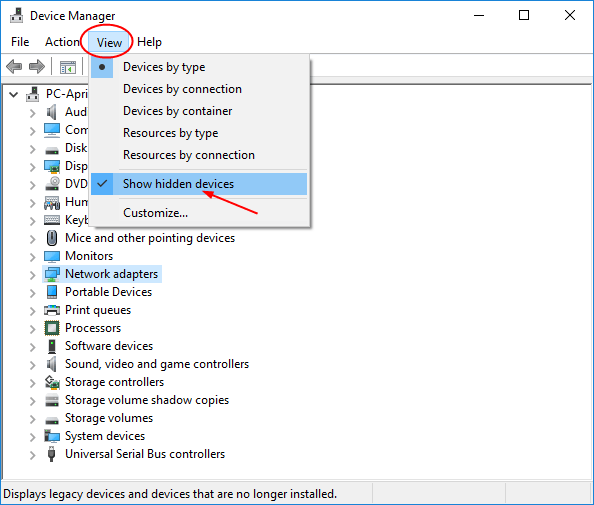
2)ClickView icon and tick onShow hidden devices .
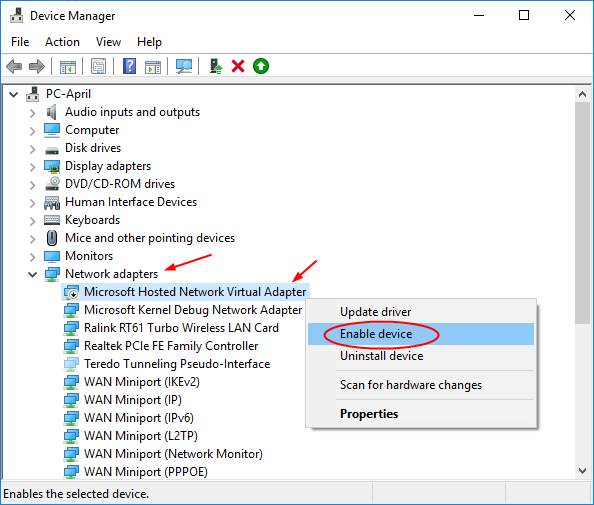
3)Find and expandNetwork adapters dialog.
Then right-click onMicrosoft Hosted Network Virtual Adapter to chooseEnable device .
4)Now set your WiFi hotspot again to see if the error has been fixed.
Method 2. Check your wireless network adapter
1)Followstep 1 in Method 1 to open Device Manager.
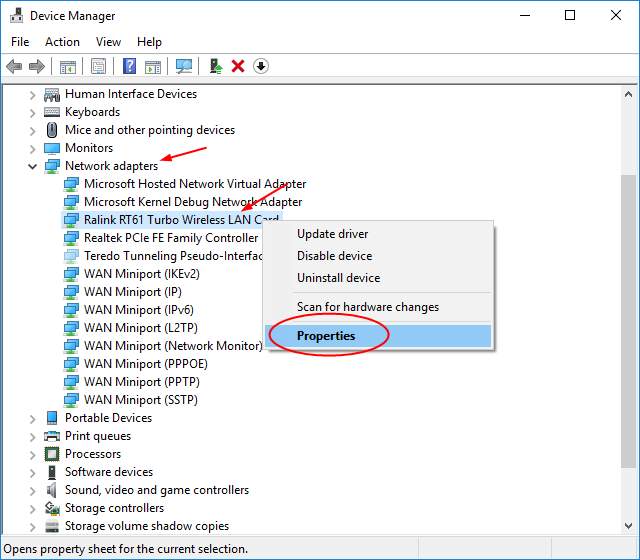
2)Find and expandNetwork adapters dialog.
Then right-click on your wireless network adapter to chooseProperties .
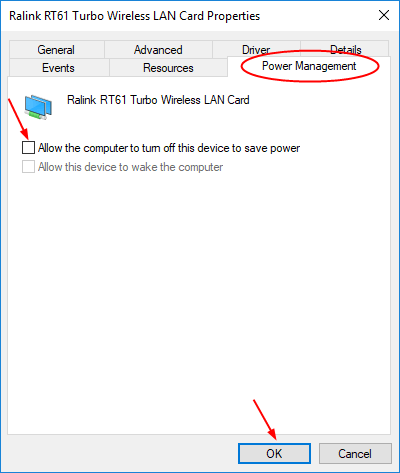
3)View onPower Management pane.
Make sureAllow the comoputer to turn off this device to save power isunchecked and clickOK to save settings.
If unluckily, neither method 1 nor method 2 helps you fix the error, it’s advise that update your WiFi driver with Method 3.
Method 3. Update your WiFi driver
It is very important to update your WiFi drivers, because the wrong or outdated drivers may cause problems.
There are two ways you can update your driver:manually andautomatically (Recommend) .
Option 1 – Manually
Followstep 1 in Method 1 to open Device Manager.
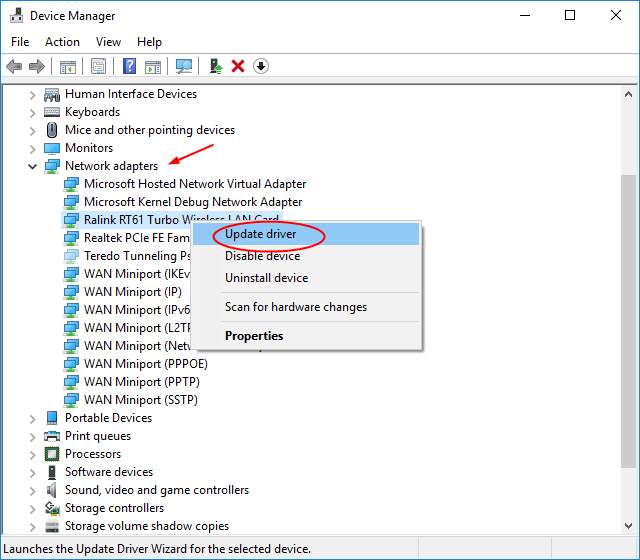
Find and expand theNetwork adapters . Right-click on your wireless network adapter in Device Manager.
Then chooseUpdate driver .
- ClickSearch automatically for updated driver software .
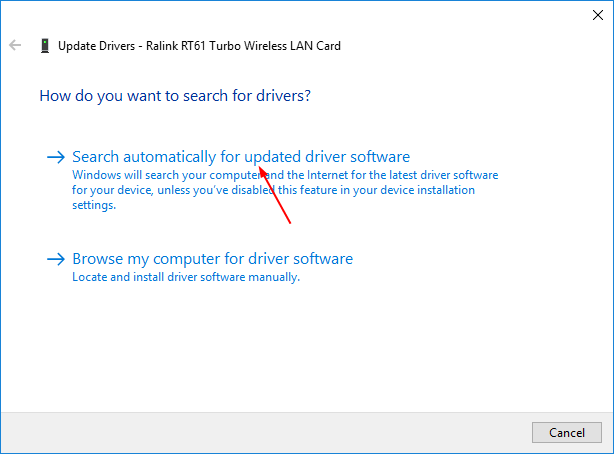
Now Microsoft will detect the update for you automatically.
However, for some reason, Microsoft cannot always find the update for you. If you receive the message:The best driver software for your device is already installed , please try the next method to update the driver.
Option 2 – Automatically
This is the quickest and easiest option. It’s all done with just a couple of mouse clicks – easy even if you’re a computer newbie.
Driver Easy will automatically recognize your system and find the correct drivers for it. You don’t need to know exactly what system your computer is running, you don’t need to risk downloading and installing the wrong driver, and you don’t need to worry about making a mistake when installing.
You can update your drivers automatically with either the FREE or the Pro version of Driver Easy. But with the Pro version it takes just 2 clicks (and you get full support and a 30-day money back guarantee ):
- Download and install Driver Easy.
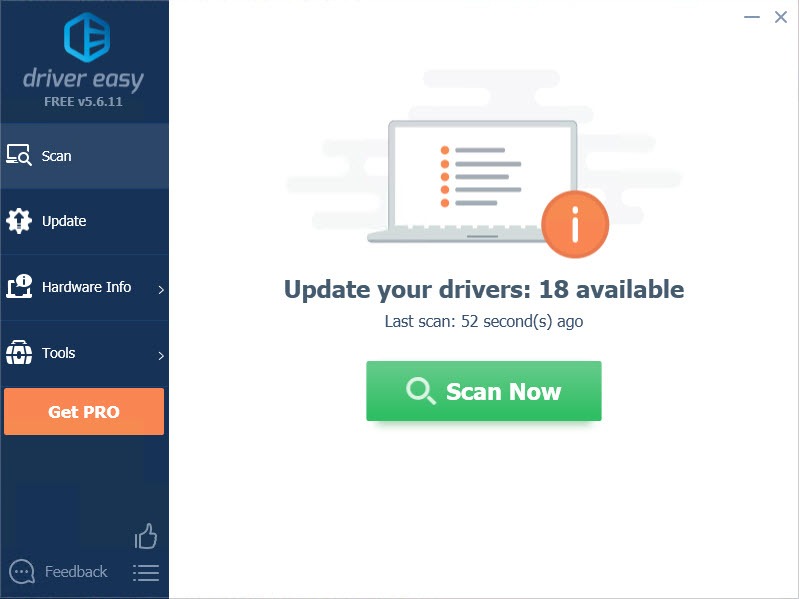
- Run Driver Easy and click the Scan Now button. Driver Easy will then scan your computer and detect any problem drivers.

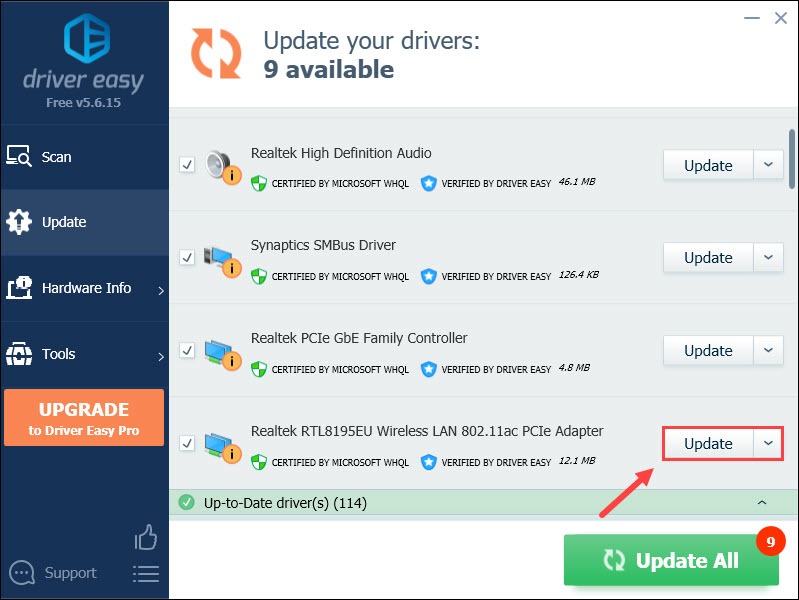
- Click the Update button next to the flagged driver to automatically download the correct version of that driver, then you can manually install it (you can do this with the FREE version).
Or click Update All to automatically download and install the correct version of all the drivers that are missing or out of date on your system. (This requires the Pro version which comes with full support and a 30-day money back guarantee. You’ll be prompted to upgrade when you click Update All.)
The Pro version of Driver Easy comes with full technical support.
If you need assistance, please contact Driver Easy’s support team at [email protected] .
After updating your driver, reboot Windows 10 to make the new driver take effect. Set your WiFi hotspot again to see if it works.
Did you solve the problem? Which method worked for you? Feel free to comment below to share with your own experiences and let me know if you have any question.
Also read:
- [New] KineMaster App for Android - Complete Review
- [New] Podcast Recorder Quality Check for 2024
- [Updated] Nine All-Inclusive Free Holiday Movies Streamed on YouTube
- [Updated] The Essential Guide to Using VSDC & Comparing It with Others for 2024
- 2024 Approved The Path to Artistic Expression – Discover Free Tools for Voice Modification
- 2024 Approved Top Studio Screening Shorts
- 使用 MoviVaiv 提供的移植器:即時無限制地在線上更改3G到MP4格式
- Easy Fixes for When Minecraft Won't Start Up on a Windows Computer
- Fix App Not Available in Your Country Play Store Problem on Vivo X100 | Dr.fone
- Fixing Power State Failure in Your Driver: Essential Tips & Solutions
- How to Repair 'Print Driver Host Service Failure' In 32 Bit Applications
- Online Marketplaces for Partnering With YouTube Content Makers
- Resolving VCRUNTIME140.dll Error: A Step-by-Step Troubleshooting Tutorial
- Restore Operational Capacity in Flawed USB-Serial Cables, Windows
- The Definitive Guide: Resolving the D3DERR_NOTAVAILABLE Error on Your PC
- Ultimate Fixes for Randomly Disappearing Connectivity of Wireless Mice on Recent Windows Versions
- Understanding & Fixing Repeated Automatic Restarts in Computers - Expert Tips Inside
- Understanding and Resolving Incorrect Parameter Mistakes Causing Error 87 in LoadLibrary Operations
- Windows 10 Upgrade Stuck at 99% [Solved]
- Title: How to Successfully Repair a PC That Fails to Start Correctly - Now Resolved!
- Author: Ronald
- Created at : 2024-12-01 00:30:49
- Updated at : 2024-12-04 05:20:50
- Link: https://common-error.techidaily.com/how-to-successfully-repair-a-pc-that-fails-to-start-correctly-now-resolved/
- License: This work is licensed under CC BY-NC-SA 4.0.