
How to Resolve Non-Responsive Custom Profile Adjustments
NVIDIA Share Unresponsive? Here Are Proven Solutions
NVIDIA Share allows you to record and share greatest gaming moments when you are playing games. But if it is turned on but not being used, it can cause black screen for a few seconds on startup. The error message likely would say “NVIDIA Share is not responding”. In this post, you will learn how to fix this issue.
The fix is very simple. You just need to turn off Nvidia Share in GeForce Experience. But before that, you may need to roll back the graphics card driver or update the graphics card driver. It depends on when the problem occurs.
**Case 1:**If the problem occurs after updating graphics card driver, please [disable NVIDIA Share](https://www.drivereasy.com/knowledge/nvidia-share-not-responding-solved/#Roll Back)then disable NVIDIA Share .
**Case 2:**If the problem occurs suddenly, pleasemake sure the graphics card is up-to-date thendisable NVIDIA Share .
How to Roll Back the NVIDIA Graphics Card Driver
Follow these steps:
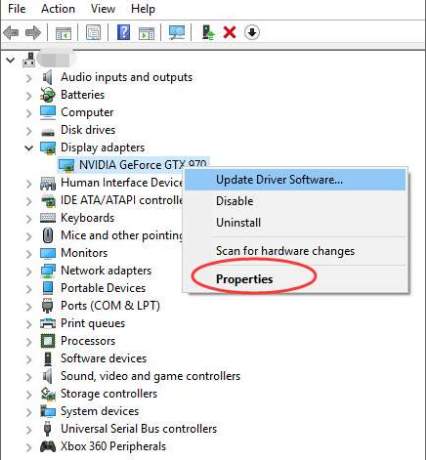
1. OpenDevice Manager .
2. Expand category “Display adapters” and clickPropertieson the context menu.
3. Click Driver tab then click onRoll Back Driver .
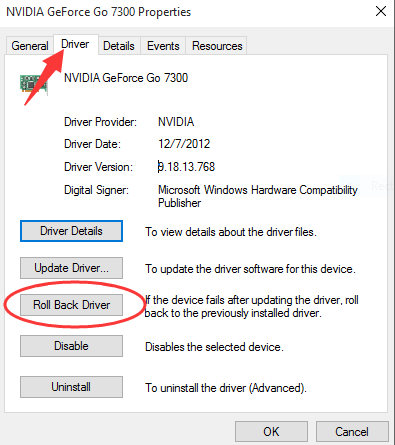
4. ClickYes button for the confirmation. Then clickOK button.
5. Restart your PC for the changes to take effect.
How to Update NVIDIA Graphics Card Driver
You can useGeForce Experienceto update the driver. Alternatively, you can use Driver Easy . Driver Easy has Free version and PRO version. After trying the Free version, if you find it helpful, you can consider upgrading to the PRO version. With the PRO version, you can enjoy free expert tech support guarantee, which allows you to contact us for assistance regarding any technical issues. You will have 30-day money back guarantee. You can ask for a full refund for any reason.
How to Turn Off NVIDIA SHARE in GeForce Experience
Follow steps below:
1. OpenGeForce Experience.
2. Click theSettingsicon at the top right corner.

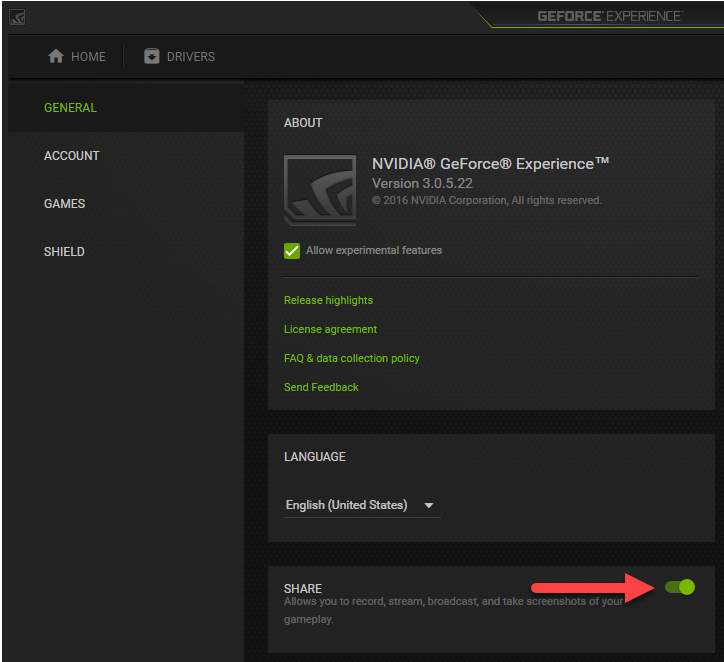
3. In the left pane, clickGENERAL and turn offSHARE in the right pane (see below screenshot).
Note: If you wish to use Nvidia Share again, refer steps above to turn it back on.
Hope the tips help you fix NVIDIA Share not working issue.
Also read:
- [New] Celebrated Selections Honorable Websites for Securing Snapchat Alerts
- [New] In 2024, Unveiling Creativity Making Striking SlideShows for FB Friends
- [New] Instagram Multimedia Mastery Tips for Mass Photo & Video Uploads for 2024
- [Solved] PUBG Stuttering | Quickly & Easily
- [Updated] In 2024, Seamless Video Meetings From Home A Guide to Proficient Use of Skype's Screen Sharing
- 2024 Approved Mastering Podcast Name Selection Step-by-Step Guide + 50+ Top Ideas List
- 2024 Approved Perfect Pairing Top Ten Kiss-Off Classics at Romance's Peak
- Blizzard's Win: World of Warcraft Dons True 3D Visuals
- Effortless Methods to Overcome the Windows Update Paused at 0% Hurdle
- In 2024, From Live Demos to Online Sharing Mastering iDevice Screenshots for Video Content
- Resolved: Fix Your Kodi Streams - Say Goodbye to Buffering!
- Resolving Excessive CPU Usage by svchost.exe Process on Windows 10 Operating System
- Troubleshooting and Fixing Critical Dxgkrnl Errors for Windows Video Playback
- Understanding and Solving 'Connection Not Secured' Issues in Firefox
- Title: How to Resolve Non-Responsive Custom Profile Adjustments
- Author: Ronald
- Created at : 2025-01-24 21:24:14
- Updated at : 2025-01-30 09:25:54
- Link: https://common-error.techidaily.com/how-to-resolve-non-responsive-custom-profile-adjustments/
- License: This work is licensed under CC BY-NC-SA 4.0.