
How to Repair Malfunctioning USB Connections in Windows 11
Windows 11 Wi-Fi Not Showing? Here Are the Fixes for Missing Connections
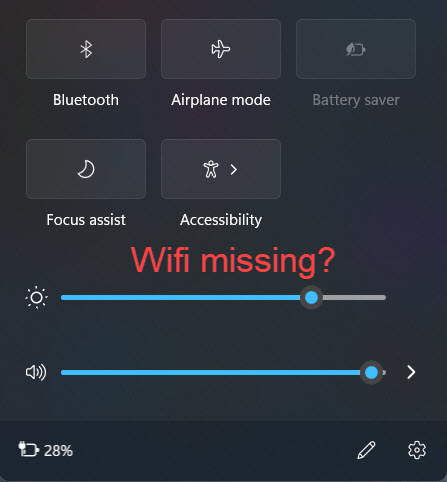
Some Windows 11 users have reported that the Wi-Fi option is missing or not showing up in their taskbar. If you’re facing the same problem, don’t worry. Here are some troubleshooting steps you can try.
Disclaimer: This post includes affiliate links
If you click on a link and make a purchase, I may receive a commission at no extra cost to you.
Try these fixes
You don’t have to try them all; simply work your way down the list until you find the one that does the trick.
- Power cycle your computer
- Enable the Wi-Fi adapter
- Update your Wi-Fi adapter driver
- Run the Network Adapter troubleshooter
- Turn on WLAN AutoConfig service
- Run network commands
- Reset your network
Fix1: Power cycle your computer
The Wi-Fi option missing issue could be caused by a random bug on your Windows 11 PC. To fix the problem, try to shut down your system, wait a few minutes, and then boot it again . It sounds simple but does work for many users.
If you haven’t tried this method before, give it a go.
Fix 2: Enable the Wi-Fi adapter
If your Wi-Fi adapter is disabled, the Wi-Fi option may not show up. To see if that’s the case, you can check your network settings. Here’s how:
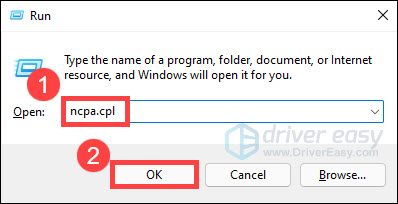
- On your keyboard, press theWindows logo key andR at the same time to invoke the Run dialog. Then typencpa.cpl and clickOK .

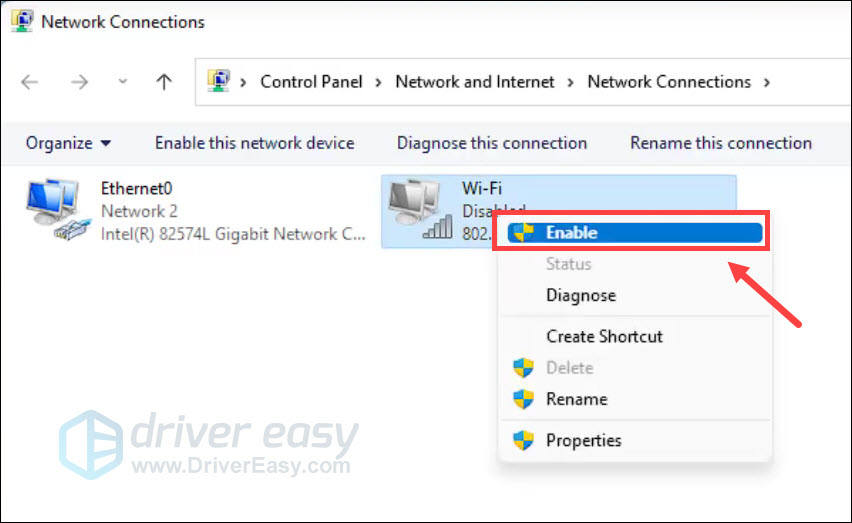
- Check if your Wi-Fi adapter is disabled or greyed out. If it is, right-click on it and selectEnable .
Once done, restart your computer and check if your Wi-Fi network shows up again.
If your Wi-Fi adapter is enabled and the issue remains, go ahead with the next fix.
Fix 3: Update your Wi-Fi adapter driver
One of the main causes of the Wi-Fi option not showing up is that you’re using a corrupted or outdated wireless adapter driver. To ensure your Wi-Fi network works properly, you need to update your Wi-Fi adapter driver to the latest version.
You can go to the manufacturer’s website, search for the latest driver for your wireless network adapter, and then download and install it manually. But if you don’t have the time, patience or computer skills to update the driver manually, you can do it automatically with Driver Easy .
Driver Easy will automatically recognize your system and find the correct drivers for it. You don’t need to know exactly what system your computer is running, you don’t need to risk downloading and installing the wrong driver, and you don’t need to worry about making a mistake when installing.Driver Easy handles it all .
- Download and install Driver Easy.
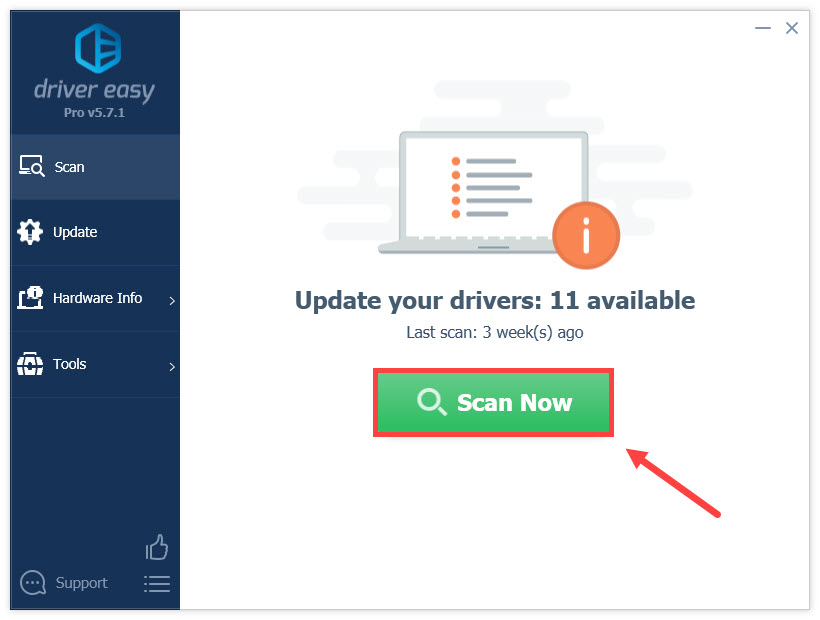
- Run Driver Easy and click theScan Now button. Driver Easy will then scan your computer and detect any problem drivers.
- ClickUpdate All to automatically download and install the correct version of all the drivers that are missing or out of date on your system. (This requires the Pro version — you’ll be prompted to upgrade when you click Update All.)
Or click theUpdate button to download the latest wireless adapter driver, then you can manually install it (you can do this with the FREE version).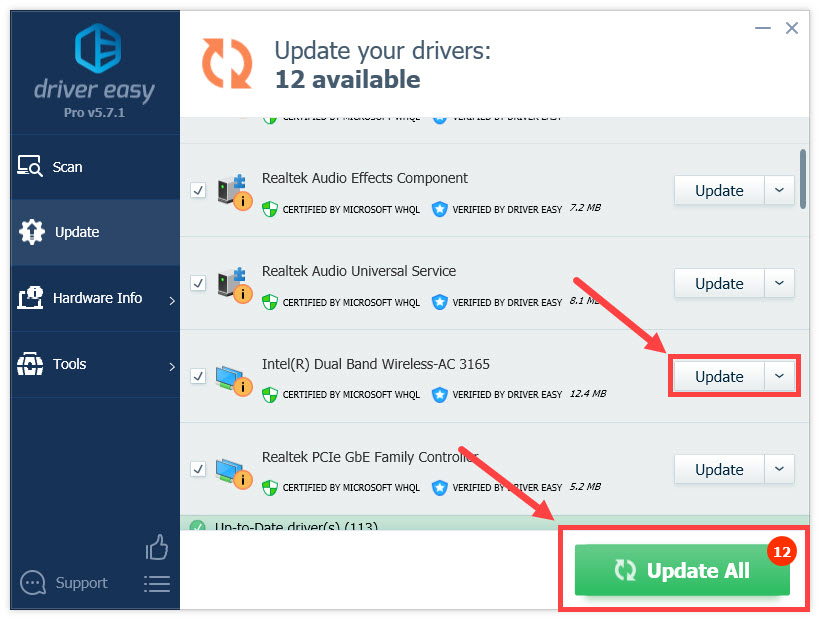
The Pro version of Driver Easy comes with full technical support. If you need assistance, please contact Driver Easy’s support team at [email protected] .
Once you’ve updated your Wi-Fi adapter driver, restart your computer.
Now check to see if your problem has been resolved. If not, move on to the next fix.
Fix 4: Run the Network Adapter troubleshooter
If updating the Wi-Fi adapter driver doesn’t help, try running the Network Adapter troubleshooter. This troubleshooter can help diagnose and fix problems with your wireless and other network adapters. To run the troubleshooter:
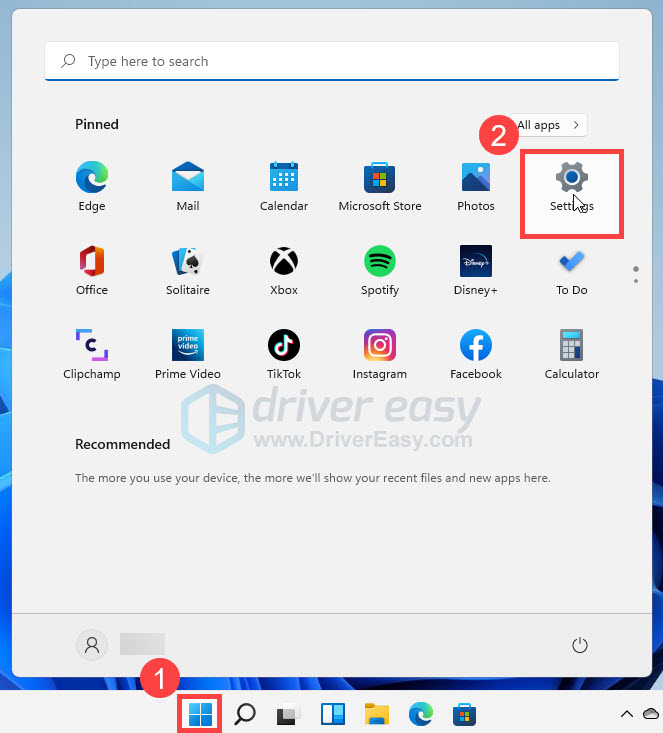
- On your taskbar, select theStart button and clickSettings .
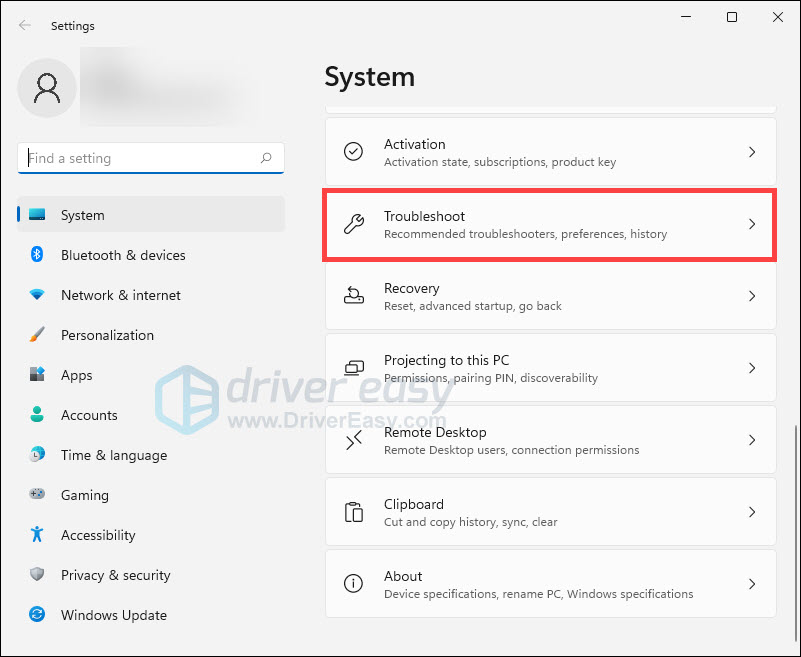
- Under System, selectTroubleshoot .
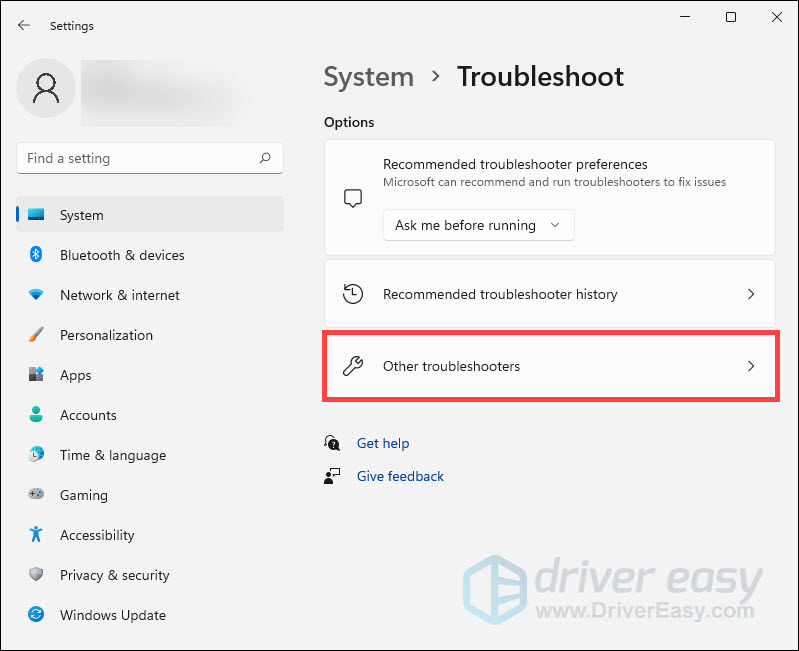
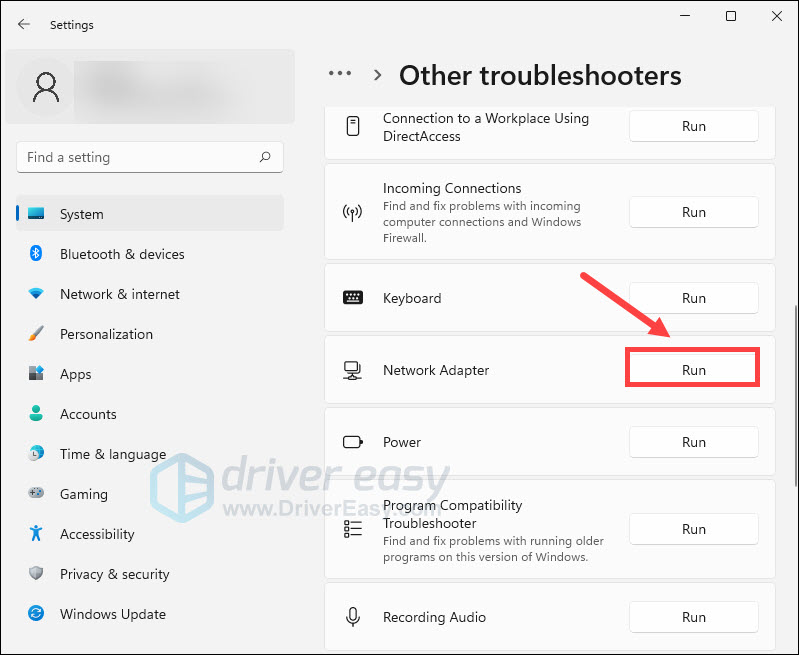
- ClickOther troubleshooters .
4. Scroll down the page, locateNetwork Adapter and clickRun .
5. Follow the steps in the troubleshooter and see if that fixes the problem.
If your issue persists, check out the next fix.
Fix 5: Turn on WLAN AutoConfig service
WLAN AutoConfig is a Windows service that helps your computer to configure, discover, connect to, and disconnect from a wireless network. If this service is disabled, your Wi-Fi won’t work. So you should make sure the WLAN AutoConfig service is running automatically. Here’s how to do it:
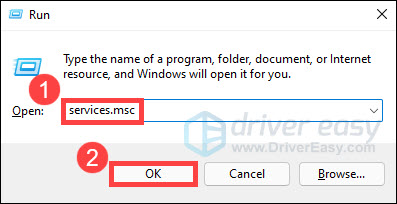
- On your keyboard, press theWindows logo key andR together to invoke the Run dialog. Then typeservices.msc and clickOK .
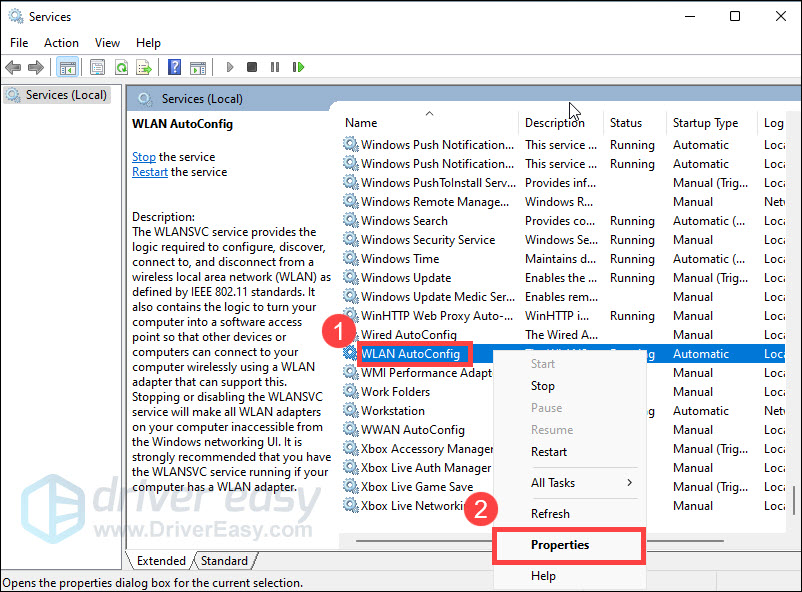
- FindWLAN AutoConfig in the list of services, right-click on it and selectProperties .
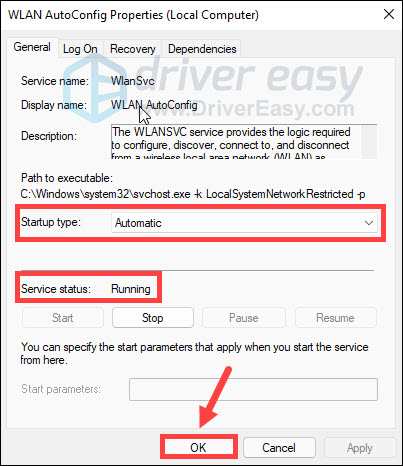
- Make sureStartup type is set toAutomatic andService status isRunning . Then clickOK to save changes.
Restart your PC and see if your Wi-Fi shows up.
If you still face the same issue, try the next fix.
Fix 6: Run network commands
When you’re having trouble with your wireless network, you can try running some network commands to manually reset the TCP/IP stack, release and renew the IP address, and flush and reset the DNS client resolver cache. Here is how to do it:
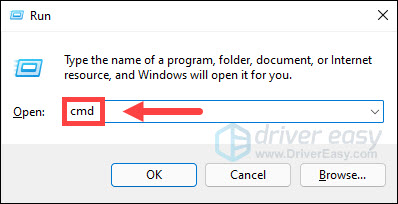
- On your keyboard, press theWindows logo key andR at the same time to open the Run dialog. Then typecmd and pressCtrl ,Shift, andEnter simultaneously to runCommand Prompt as administrator.
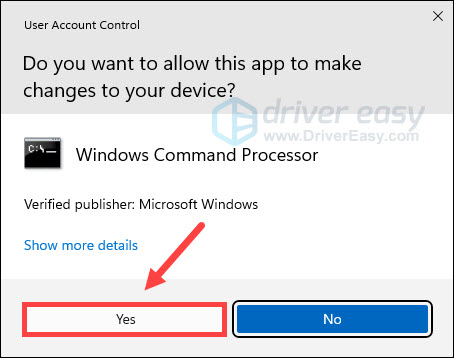
- If you are prompted for permission by User Account Control, clickYes .
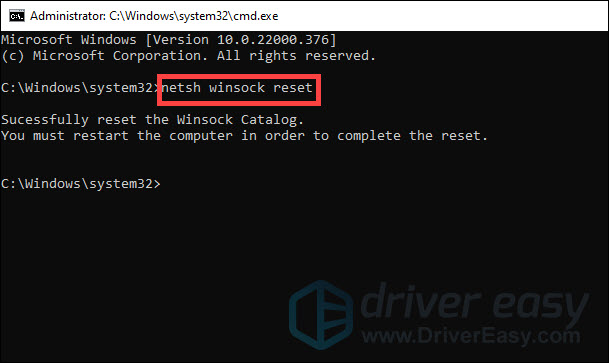
- At the command prompt, typenetsh winsock reset and pressEnter .
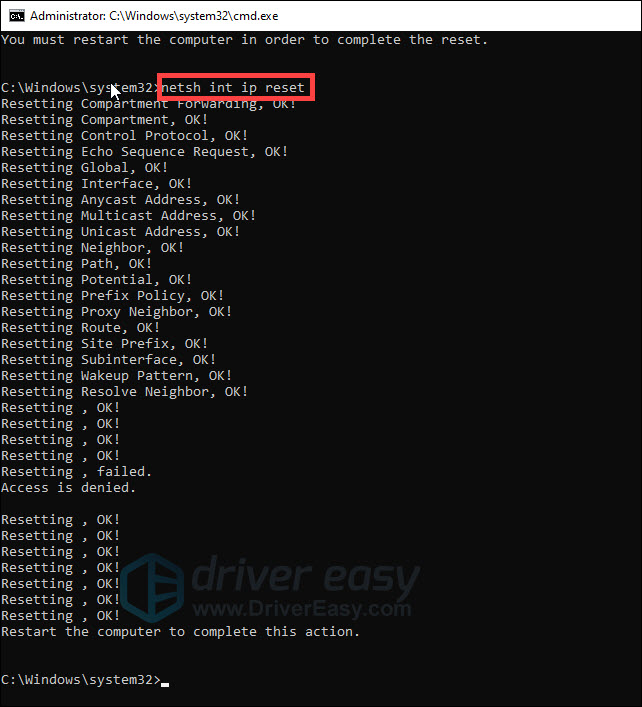
- Typenetsh int ip reset and pressEnter .
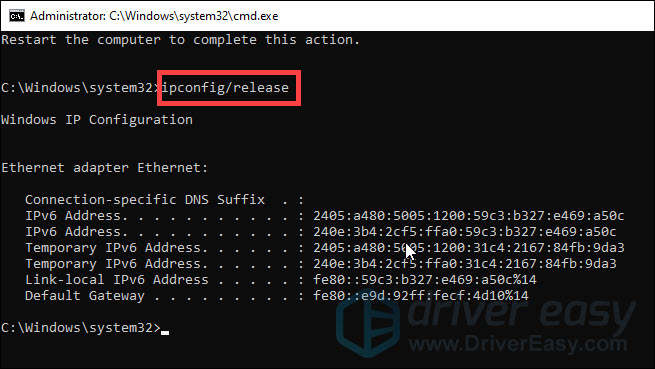
- Typeipconfig /release and pressEnter .
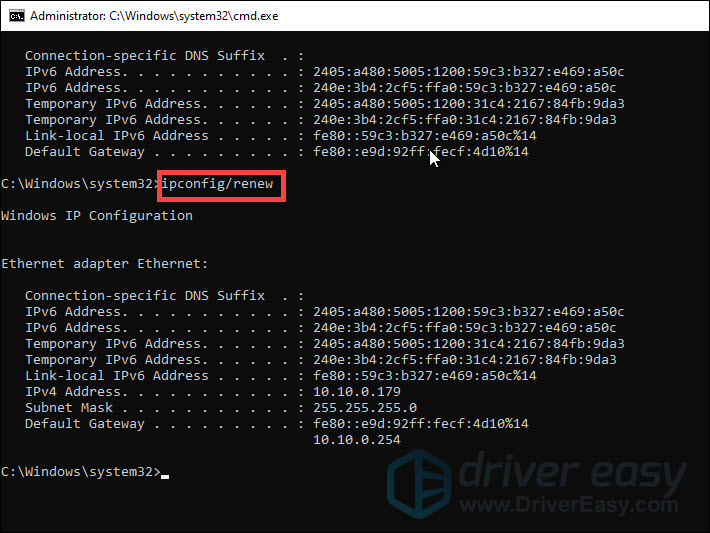
- Then typeipconfig /renew and pressEnter .
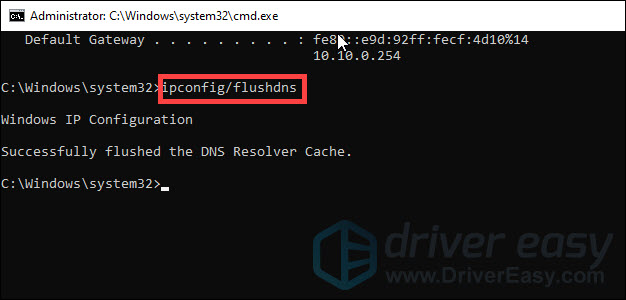
- Typeipconfig /flushdns and pressEnter .
Once you’ve run all those commands, restart your computer and try to connect to the Wi-Fi network.
If this method doesn’t help, try the last fix below.
Fix 7: Reset your network
If you’ve tried all of the above steps and you still can’t get your Wi-Fi to work, the last thing you can try is to reset your network. This will remove and then reinstall all your network adapters and the settings for them will be set to the defaults. To do so:
- On your taskbar, select theStart button and clickSettings .
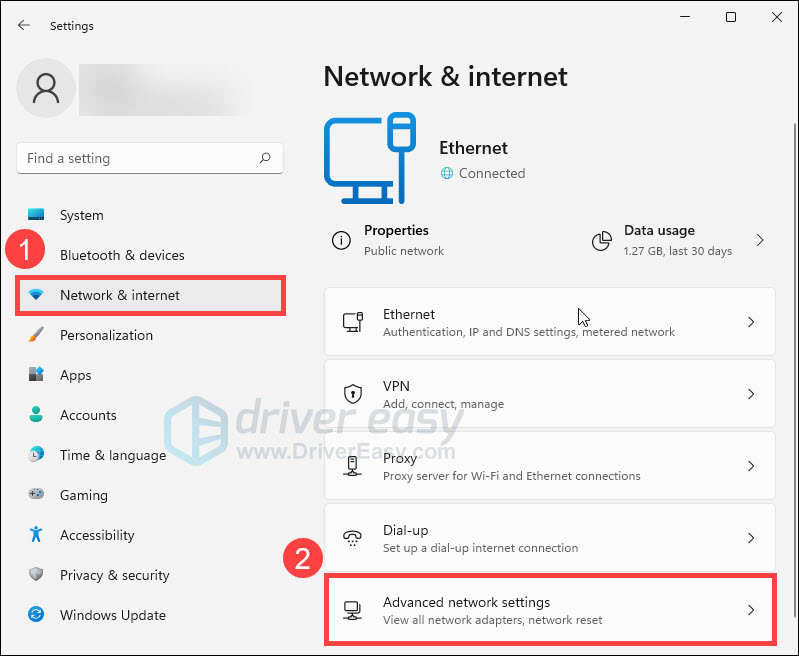
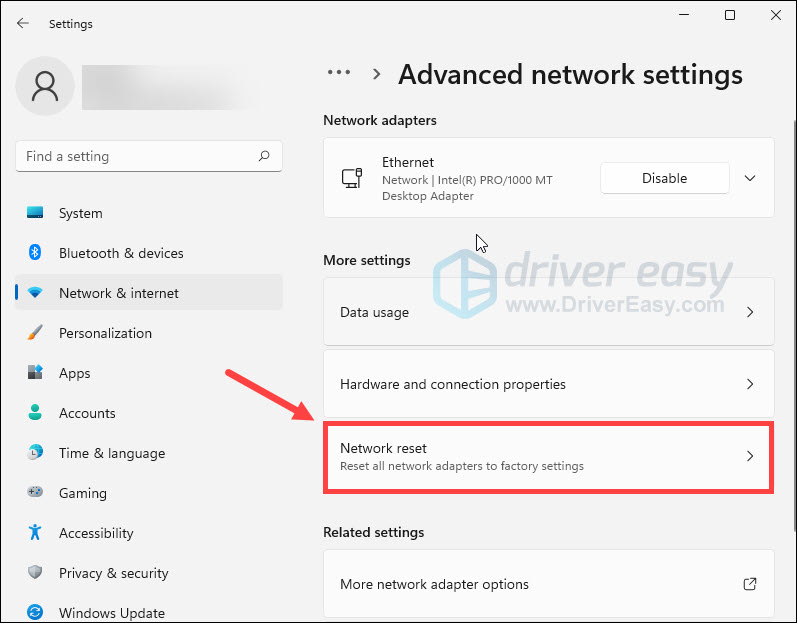
- SelectNetwork & internet , then clickAdvanced network settings .
- Under More settings, clickNetwork reset .
4. ClickReset now .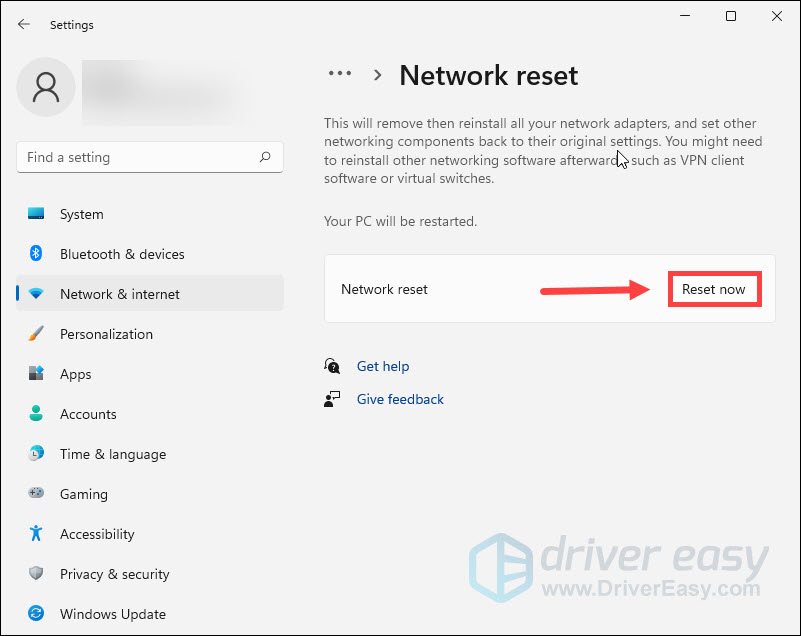
5. ClickYes to confirm again.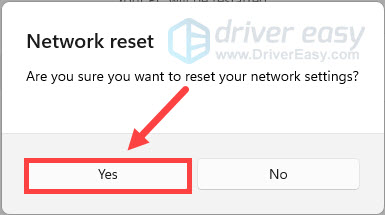
Wait for your computer to restart, and see if that fixes the problem.
That’s all about it. Hopefully, this post helped. If you have any questions or suggestions, feel free to leave us a comment below.
Also read:
- [Updated] In 2024, Top Tickles for Young Game Fans
- Build Your Balanced Eating Schedule Using ChatGPT – Tips & Tricks
- Bypass Windows Settings App Failures Effectively
- Bypassing Google Account With vnROM Bypass For Tecno Pova 5
- Charting a Course to a Million Fans with This Tutorial for 2024
- Diagnose & Fix: Mouse Not Responding On Desktop Computers
- Download the Latest Epson DS-530 Printer Drivers: Compatible with Windows 11 for 64-Bit Systems
- Expert Advice to Fix Windows Error Message 31
- Extension Headers in IPv6 Must Be Carefully Managed and Inspected as They Could Potentially Be Exploited for Malicious Purposes
- How To Unlock Any Realme 12 Pro 5G Phone Password Using Emergency Call
- In 2024, Best Online WebM Video Compressors
- In 2024, How to Transfer Contacts from Realme Narzo N53 To Phone | Dr.fone
- Overcoming Undetected Hurdles: Successfully Recognizing Your Western Digital My Passport Ultra in Windows
- Resolving IAStorDataSvc High CPU Drain in Win11 Systems: A Comprehensive Guide
- Resolving Windows Printer Driver Issues: A Comprehve Solution Guide
- Revive Your Click with Quick Logitech Fix
- Troubleshooting Guide: Getting Fortnite to Work with Incompatible Graphics in Windows
- Troubleshooting Windows 11 Update Issues - How to Fix Stuck Updates
- Unlocking Solutions for When Your Steam Downloads Don’t Work as Expected
- Title: How to Repair Malfunctioning USB Connections in Windows 11
- Author: Ronald
- Created at : 2024-09-24 19:54:48
- Updated at : 2024-10-01 17:17:31
- Link: https://common-error.techidaily.com/how-to-repair-malfunctioning-usb-connections-in-windows-11/
- License: This work is licensed under CC BY-NC-SA 4.0.